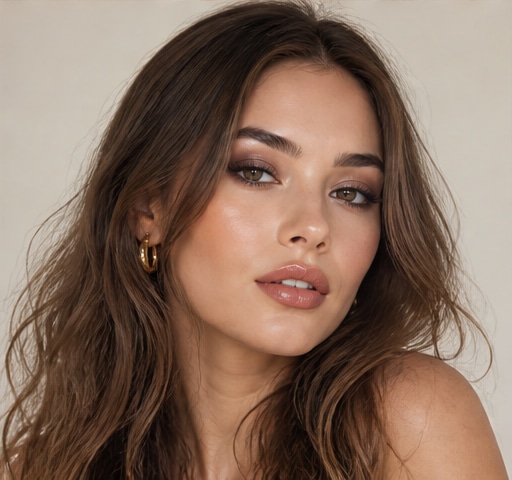
 Try this styleon your selfie · free
The 10-Step Everyday Makeup Routine for Beginners
Published June 18, 2026
A foolproof, order-of-operations makeup routine that takes ten minutes and actually looks like you, but better.
Why Order of Operations Matters
The number-one beginner mistake isn't the wrong product, it's the wrong order. Makeup is built in layers, and each one needs the right base beneath it to grip and blend. Cream goes before powder, base before color, eyes can go before or after face depending on your style. Get the sequence right and everything melts together; get it wrong and you'll fight patchiness, cakeyness, and disappearing products all day. This ten-step routine follows the order professionals use, and once it's muscle memory you'll be done in about ten minutes. The beauty of a fixed sequence is that it removes decision fatigue, you stop wondering "does blush go before or after powder?" and just flow through the steps. Master the order first, then make it your own.
Steps 1 to 3: Skincare and Primer
Every good face starts with skincare, so step one is a clean, moisturized face, let your moisturizer absorb for a few minutes. Step two is sunscreen, the single most important thing you'll apply all day, use at least SPF 30 and give it a moment to set. Step three is primer, which smooths your canvas and helps makeup last; choose a hydrating one for dry skin or a pore-blurring, mattifying one for oily skin, and apply a pea-sized amount over the areas where makeup tends to fade. These first three steps aren't technically makeup, but skipping them is why beginners' makeup slides off or looks patchy by lunch. Spend ninety seconds here and the next seven steps go on twice as smoothly and last twice as long.
Steps 4 to 5: Base and Concealer
Step four is your base. As a beginner, you don't need full-face foundation, a tinted moisturizer or a sheer foundation gives natural, even tone that's almost impossible to mess up. Apply a small amount with a damp sponge, dotting it on and bouncing it out from the center of your face. Step five is concealer, applied after base so you only spot-correct what foundation didn't cover. Dab a brightening shade in a small triangle under the eyes and a touch on any blemishes or redness, then gently tap, never rub, to blend. Use a light hand: concealer that's too thick creases and draws attention to the very thing you're hiding. Less product, well-blended, always looks more natural and stays put far longer.
Steps 6 to 7: Setting and Cheeks
Step six is setting your base so it doesn't slide, dust a small amount of translucent or skin-tone powder over your T-zone and under-eyes with a fluffy brush, keeping the rest of your face fresh and skin-like. This locks in your base before you add color. Step seven brings your face to life with blush and bronzer. Smile and sweep blush onto the apples of your cheeks for an instant healthy flush, then add a little bronzer where the sun would naturally hit, the perimeter of your forehead, cheekbones, and jaw, to add warmth and dimension. Build both gradually; you can always add more, but over-applied blush is hard to walk back. This step is what makes you look alive rather than flat.
Steps 8 to 9: Eyes and Brows
Step eight is brows, your face's frame. Brush them up with a spoolie, then fill sparse spots with light, hair-like strokes using a pencil or powder one shade lighter than you think, and set with a clear or tinted gel. Step nine is eyes, kept simple for everyday: sweep one neutral, slightly shimmery shade across the lid, add a soft matte brown into the crease for subtle depth if you like, then finish with one to two coats of mascara, wiggling the wand from root to tip. A thin line of brown or black liner along the upper lashline is optional but adds definition. Groomed brows and defined lashes do most of the heavy lifting, so even if you skip everything else on the eyes, do these two.
Step 10 and Pulling It Together
Step ten is lips, and it ties the whole look together: a tinted balm, a my-lips-but-better nude, or a soft rose suits almost everyone for daytime, and a swipe of gloss on top adds freshness. To make your work last, finish with a light mist of setting spray held an arm's length away. Now check everything in natural daylight, looking for harsh edges, mismatched base, or unblended blush. If you want to experiment with different looks before committing to new products, you can preview makeup styles on your own selfie with GlowMaxing first. Don't aim for perfect on day one, this routine gets faster and more intuitive every time you do it, and within a couple of weeks the whole sequence will feel like second nature.
The quick checklist
- Always work in order: skincare, SPF, primer, base, then color
- Start with a tinted moisturizer instead of full foundation as a beginner
- Apply concealer after base so you only spot-correct what's left
- Set your base with powder before adding any blush or bronzer
- Fill brows with light strokes and set them, they frame your whole face
- Keep everyday eyes to one neutral shade plus mascara
- Finish with a tinted lip and a daylight check before you head out
✦ Free to start✨ Try these looks on your own selfie with GlowMaxing →Upload one selfie and try any hairstyle, color or makeup look instantly with AI. Free to start.Download on theApp Store