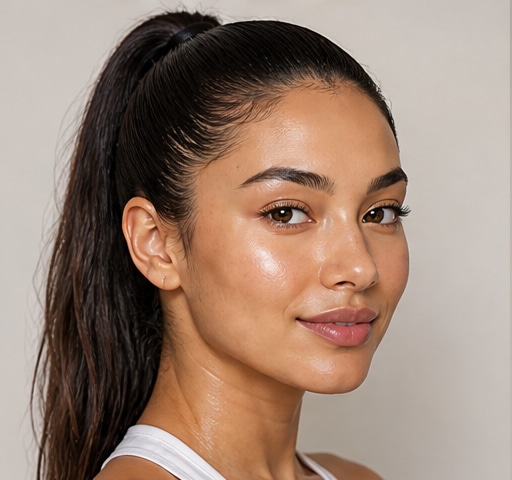
 Try this styleon your selfie · free
How to Apply Cream Products for a Skin-Like Finish
Published July 28, 2026
Cream blush, bronzer, and highlight melt into the skin for a dewy, lived-in glow when you layer them in the right order with the right tools.
Why Cream Products Look So Natural
Cream products, blush, bronzer, contour, and highlight in a balm or cream texture, blend into the skin rather than sitting on top of it the way powders can. Their emollient, slightly sheer formulas catch the light softly and let your natural skin texture show through, giving that coveted skin-like, lit-from-within finish that looks like genuinely good skin rather than makeup. They are especially flattering on dry, mature, or normal skin because they add moisture and a dewy glow instead of emphasizing dryness or fine lines, which powders can settle into. The trade-off is that creams require a slightly different application logic than powders, mainly around layering order and tools. Once you nail that, creams give you the most modern, natural-looking dimension of any product category, perfect for the current no-makeup makeup and clean-girl aesthetics.
Layer in the Right Order
Order is everything with creams. Always apply cream products onto bare skin or over a thin, still-tacky layer of liquid or cream foundation, never over powder, because powder creates a barrier that makes creams grab, streak, and refuse to blend. The correct sequence is skincare, then a light base if you want it, then your cream blush, bronzer, and highlight while the skin is still slightly fresh, and only then, if needed, a light dusting of powder to set the high points. If you apply cream over a fully powdered face, it will cling in patches and look blotchy. Think creams before powders, always. This single rule prevents the most common cream-product frustration and lets each layer melt smoothly into the last for that seamless, dewy, dimensional finish you are after.
Use Fingers and Sponges, Not Stiff Brushes
Tools make or break a cream finish. The warmth of your fingertips is the best applicator because it melts the product into the skin as you press and tap it on, which is ideal for blush and highlight. A damp makeup sponge is excellent for sheering out and blending cream products into a seamless, skin-like veil; press and roll rather than wipe. Avoid stiff, dense powder brushes, which tend to move cream around and leave streaks. If you prefer a brush, choose a dense but soft synthetic one made for cream products and use light stippling and buffing motions. Whatever the tool, always blend with pressing and tapping motions rather than dragging, since dragging disturbs your base underneath. Building with fingers and a damp sponge gives the most natural, melted-in result every single time.
Build Sheer and in Thin Layers
Cream products are pigmented and can go opaque fast, so the golden rule is to start with less than you think you need and build up. Tap a small amount onto the back of your hand first, pick up a little on your fingertip or sponge, and apply in thin, sheer layers, building intensity gradually until you reach the flush or glow you want. It is far easier to add more than to remove a too-heavy cream without disturbing your foundation. Working in thin layers also keeps the finish looking like skin rather than a thick mask of color. Place blush on the apples of the cheeks, bronzer where the sun hits, and highlight on the high points, blending the edges of each so nothing has a hard line. Sheer, gradual building is the heart of a believable cream finish.
Set Strategically, Not Everywhere
Creams can move or fade on oily skin, but the fix is not to bury them in powder, which kills the dewy glow. Instead, set strategically. Dust a tiny bit of finely milled translucent powder only on the areas that get oily or where you need extra longevity, like the center of the cheeks or the T-zone, and leave the high points of the cheekbones and the glow areas powder-free so they stay luminous. For a longer-lasting cream blush, you can layer a matching powder blush lightly on top, which locks the cream in while keeping color true. A light setting spray at the end melds everything together and revives the dewiness. The aim is just enough setting to keep things in place without sacrificing that fresh, skin-like radiance that drew you to creams in the first place.
Choose Shades and Finishes That Suit You
Cream products come in dewy, satin, and soft-matte finishes, so pick based on your skin and the look you want; dry skin loves dewy and satin, while oilier skin may prefer a soft-matte cream that still blends like a dream. Match cream blush to your undertone, going peach and coral for warm skin and rose and berry for cool, and keep cream bronzer no more than one to two shades deeper than your skin so it reads as warmth rather than mud. Test how multiple cream shades and finishes look on your own face by previewing them on a selfie with GlowMaxing before buying, since cream pigments can surprise you once they warm up on the skin. The right shade in a melted, skin-like finish is the fastest route to looking effortlessly, glowingly healthy.
The quick checklist
- Apply creams before powder, never over a fully powdered face
- Use fingertips and a damp sponge instead of stiff powder brushes
- Press and tap to blend, never drag, so you don't disturb your base
- Start sheer and build thin layers until you reach the right intensity
- Set only oily areas with powder, leaving the glow spots luminous
- Lock cream blush with a matching powder for extra longevity
- Match shades to your undertone and finish to your skin type
✦ Free to start✨ Try these looks on your own selfie with GlowMaxing →Upload one selfie and try any hairstyle, color or makeup look instantly with AI. Free to start.Download on theApp Store