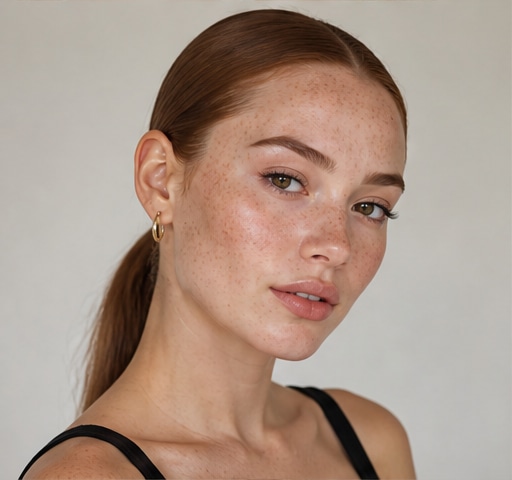
 Try this styleon your selfie · free
Best Blush Placement for Round, Square, and Heart Faces
Published June 27, 2026
How to place blush to flatter and balance your specific face shape, not just dab the apples.
Why Placement Matters More Than Color
Most people learn to smile and dab blush on the apples of their cheeks, but placement is what actually shapes the face, and the ideal spot changes with your face shape. Blush is not just about adding a flush of color; placed strategically, it can lift, lengthen, slim, or soften your features the way contour does, but with a healthier, more natural effect. The wrong placement can do the opposite, making a round face look rounder or dragging features down. Before choosing where to apply, identify your face shape by looking at the width of your forehead, cheekbones, and jaw and the overall length of your face. Once you know your shape, a small adjustment in angle and height transforms how the same blush flatters you. This is one of the highest-impact, lowest-effort makeup tweaks you can make.
Round Faces: Lift and Lengthen
A round face has soft, full cheeks and similar width and length, so the goal is to create the illusion of more structure and length. Avoid applying blush directly to the apples, which adds fullness and emphasizes roundness. Instead, place blush slightly higher on the cheekbones and angle it diagonally up toward the temples, drawing the eye upward and outward to elongate the face and create a subtle lifted, sculpted effect. Blending up and back rather than out and round is the key. A slightly cooler-toned or muted blush can also add a touch of definition. Concentrating color higher and angling toward the hairline visually stretches the face vertically, balancing the natural width. Keep the heaviest concentration of color near the top of the cheekbone, fading as you blend toward the temple for a lifted, slimming look.
Square Faces: Soften the Angles
A square face has a strong, angular jaw and a forehead and jaw of similar width, so the goal is to soften those corners and add roundness. Apply blush to the apples of the cheeks in a soft, rounded motion, blending it in gentle circles rather than harsh diagonal lines. Keeping the color centered on the roundest part of the cheek and blending it softly draws attention to the center of the face and away from the angular jaw, creating a more balanced, softened appearance. Avoid sharp, angular blush placement that echoes and emphasizes the strong jawline. Warmer, rosy tones applied in a diffused, circular way add a youthful softness that flatters the structured features of a square face. The overall aim is to introduce curves and a gentle focal point at the center to counterbalance the natural angularity of the shape.
Heart Faces: Balance the Width
A heart-shaped face is wider at the forehead and cheekbones and narrows to a pointed chin, so the goal is to balance the upper width and draw attention toward the center. Apply blush a little lower and more toward the center of the cheeks, just below the apples, blending slightly outward but not too high or wide, which would emphasize the already-wider top of the face. Keeping placement central and slightly lower brings focus down toward the middle of the face, balancing the narrower chin against the broader forehead. Soft, rounded application works well here. Avoid sweeping blush high up into the temples, which exaggerates the width at the top. A softly diffused flush centered on the cheeks creates harmony, making the upper and lower halves of a heart-shaped face feel more proportional and bringing a natural, balanced glow to the center.
Oval, Long, and Diamond Quick Guide
If your face is not clearly round, square, or heart, a few more shapes round out the picture. An oval face is balanced and can wear blush right on the apples blended slightly up toward the temples, the most versatile placement. A long or oblong face benefits from blush applied horizontally across the apples and out toward the ears, which adds width and visually shortens the face, so avoid placing it too high. A diamond face, widest at the cheekbones, suits blush on the apples blended slightly forward toward the center to soften prominent cheekbones rather than emphasizing their width. The principle across all shapes is the same: place color to counterbalance your most prominent feature, whether that is width, length, or angularity, so the overall face reads as more balanced and harmonious.
Technique, Tone, and a Quick Preview
Beyond placement, a few universal habits keep blush looking flattering. Build color in light layers so you can control intensity, and always blend the edges so there is no harsh start or stop. Cream blushes melt into the skin for a natural flush and are great for drier or mature skin, while powders give more control on oily skin. Choose a tone that complements your undertone, warm peaches and corals for warm skin, cooler pinks and berries for cool skin. If you are unsure which placement and shade truly flatter your face shape, you can upload a selfie to GlowMaxing and preview different blush styles to see how placement changes your look before you commit. Knowing your shape and your most flattering angle turns blush from a random dab into a quick, deliberate step that genuinely sculpts and brightens your face.
The quick checklist
- Identify your face shape before deciding where to place blush
- Round faces: blush high on the cheekbone, angled up toward the temple
- Square faces: soft circular blush on the apples to soften the jaw
- Heart faces: blush slightly lower and centered to balance the forehead
- Long faces: sweep blush horizontally to add width and shorten
- Build color in light layers and always blend the edges
- Match blush tone to your undertone for the most natural flush
✦ Free to start✨ Try these looks on your own selfie with GlowMaxing →Upload one selfie and try any hairstyle, color or makeup look instantly with AI. Free to start.Download on theApp Store