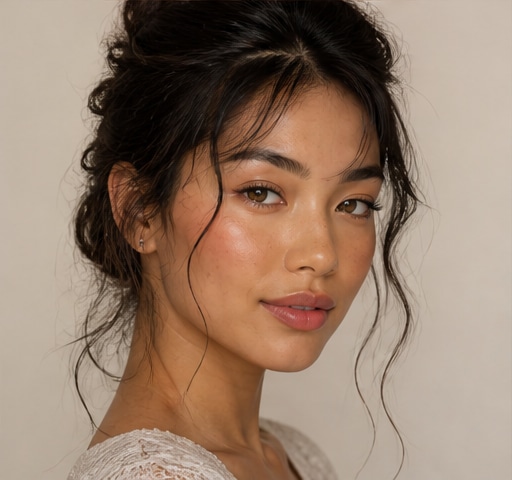
 Try this styleon your selfie · free
How to Do Your Own Makeup for a Photoshoot
Published July 21, 2026
Camera-ready makeup follows different rules than everyday glam, and a few pro tricks keep you looking flawless instead of flat or shiny in photos.
Prep Skin So It Photographs Smooth
Cameras magnify texture, so flawless prep matters more than any product. Start the night before by exfoliating gently and using a hydrating mask so skin is plump and smooth. On shoot day, cleanse, apply a lightweight moisturizer, and let it fully absorb. Use a smoothing primer over any areas with visible pores or fine lines, since these catch light and show up sharply on camera. Dab a small amount of eye cream to prevent concealer from creasing under bright lighting. Avoid heavy facial oils right before, because they can read as shine in photos. Well-hydrated, well-prepped skin gives foundation something even to grip, which prevents patchiness and that dreaded cakey look once the lights and lens start picking up every detail of your complexion.
Build Buildable, Matte-Leaning Coverage
Photography lighting is unforgiving, so go for medium, buildable coverage rather than your everyday sheer tint. Choose a foundation that leans satin-to-matte; very dewy formulas can photograph as oily under flash. Apply in thin layers with a damp sponge, building only where you need it, then conceal under the eyes and on any blemishes with a shade that matches precisely. Set everything with a light, finely milled translucent powder, paying special attention to the T-zone, which shines most on camera. Avoid powders or products containing SPF or light-reflecting particles for flash photography, because they can cause white cast or flashback that makes your face look ghostly white in the final images. Test your full face under bright light or with your phone flash before the shoot, and adjust anything that reflects back too harshly.
Sculpt and Add Dimension
Bright, flat lighting washes out the face, so contouring and definition that might look heavy in person often read as just right on camera. Use a matte contour shade slightly cooler than your skin to define the cheekbones, jaw, and sides of the nose, blending thoroughly so there are no harsh lines. Add blush a touch more pigmented than usual on the apples of the cheeks to bring back warmth and life. A subtle, non-glittery highlight on the tops of the cheekbones and the bridge of the nose catches light beautifully, but keep it controlled, since chunky glitter can flare under flash. The aim is sculpted dimension that survives strong lighting. Step back from the mirror and check your face from a distance, because what looks dramatic up close frequently reads as natural and polished through the lens.
Define Eyes and Brows for the Lens
Eyes recede on camera, so define them more than you would for daily wear. Fill and shape your brows with defined, hair-like strokes since strong brows frame the face and read well in photos. Use neutral, well-blended eyeshadow to add depth, deepening the outer corner and crease so the eyes do not look flat under bright light. Tightline the upper lash line with a dark pencil to make lashes look fuller without an obvious line. Curl your lashes and apply two coats of mascara, or add individual false lashes for extra impact if the shoot calls for it. A little dark liner smudged into the lashes adds definition without harshness. Well-defined eyes keep your gaze sharp and expressive in the final images instead of disappearing into a washed-out face.
Lock It Down for Long Wear
Shoots run long and lights are hot, so longevity is essential. After everything is applied, mist your face with a long-wear setting spray, holding it about eight inches away and spritzing in an X and T motion, then let it dry naturally. This melds powder and cream layers together and stops that powdery, separated look. Keep blotting papers nearby to press away shine between setups without disturbing your makeup, since adding more powder repeatedly causes cakiness. Carry a small touch-up kit: your lipstick, a bit of concealer, and a clean brush. For lips, line and fill the entire lip with liner before color so the shade lasts even if the gloss fades. Locked-in makeup means you can focus on posing and expression rather than running to fix shine or fading every few minutes.
Test Your Look Before the Day
Never debut a brand-new look on shoot day. Do a full trial run a few days before, then photograph yourself in different lighting, with and without flash, to see how everything actually translates. Things that look perfect in the mirror, like a slightly cool foundation or a shimmer that flashes back, only reveal themselves on camera. Review the test photos zoomed in and adjust coverage, contour placement, or shimmer accordingly. If you want to experiment with shades and styles before buying or committing, upload a selfie and preview different makeup looks with GlowMaxing to narrow down what flatters you on camera. This dry run also lets you time yourself, so on the actual day you can recreate the look calmly and confidently without scrambling or second-guessing your choices.
The quick checklist
- Exfoliate and hydrate the night before for smooth, plump skin
- Avoid SPF and shimmery powders that cause flashback under flash
- Use medium, satin-to-matte coverage applied in thin layers
- Contour and blush slightly heavier than usual to fight flat lighting
- Define brows and eyes more than daily so they don't recede on camera
- Set with a long-wear spray and carry blotting papers, not extra powder
- Do a full test run and photograph it in flash before the real shoot
✦ Free to start✨ Try these looks on your own selfie with GlowMaxing →Upload one selfie and try any hairstyle, color or makeup look instantly with AI. Free to start.Download on theApp Store