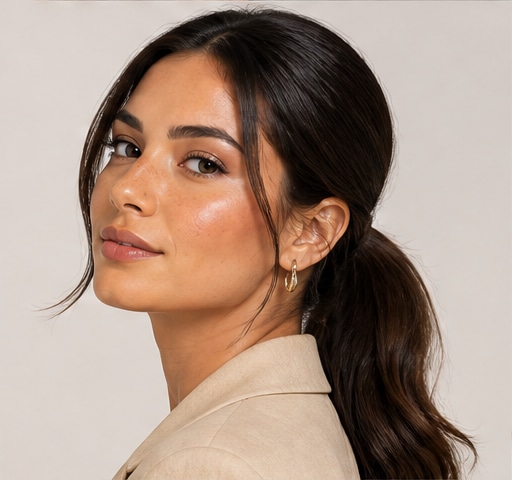
 Try this styleon your selfie · free
How to Fill In Sparse Eyebrows Naturally
Published June 24, 2026
Hair-like strokes, the right shade, and smart product choices for full brows that never look drawn-on.
Map Your Natural Brow Shape First
Before adding any product, find the three points that define a flattering brow so you fill within your natural framework instead of inventing a new shape. Hold a thin brush or pencil vertically against the side of your nose; where it crosses your brow is where the brow should start. Angle it from the nostril through the outer edge of your iris to find your arch peak. Angle it from the nostril past the outer corner of your eye to mark where the brow should end. Mark these three points lightly. Filling within them keeps your brows balanced and proportional to your face. Sparse brows often look sparser because they lack a clear shape, so defining these anchors first means every stroke you add reinforces a natural, intentional line rather than scattering color randomly across thin areas.
Choose the Right Shade
Shade is what separates natural brows from obviously drawn-on ones. The classic rule is to match brow products to your hair color, but for the most natural result go one to two shades lighter than your hair if you have dark hair, and one shade darker if you are blonde. Going too dark is the single biggest aging, harsh-looking mistake. Pay attention to undertone too: cool-toned brunettes should avoid warm, reddish browns, while warmer hair suits softer taupe-browns. If you are between shades, the lighter option almost always looks more believable because real brow hair is rarely uniformly dark. For very sparse brows, layering a slightly cooler, ashier tone reads more like natural hair than a flat warm brown. The goal is depth that looks like your own hair caught the light, not a painted-on block of color.
Use Hair-Like Strokes, Not Blocks
The secret to natural-looking fill is mimicking individual hairs rather than coloring in a solid shape. A fine-tipped brow pencil or a brow pen with a thin nib lets you draw short, light, flicking strokes that follow the direction your hair actually grows, upward and outward at the inner third, then angling along the natural line toward the tail. Build sparse areas with several thin strokes rather than one heavy line, leaving tiny gaps so it reads as hair, not paint. Use the lightest pressure at the front of the brow, where natural hair is softest, and slightly more definition toward the arch and tail. If you use brow powder instead, apply it with a stiff angled brush using the same feathery motions, keeping the front of the brow soft and building density only where it is genuinely sparse.
Layer Products for Density
For very sparse brows, no single product does everything, and layering creates the most realistic fullness. A tinted brow gel brushed through first coats the existing hairs with color and makes thin brows instantly look fuller before you fill any gaps. Then use a pencil or pen for hair-like strokes in the bare spots, and optionally dust a little powder underneath the strokes to add soft background density without harsh lines. A fibre or volumizing brow gel containing tiny hair-like fibers can cling to your real hairs and dramatically boost the appearance of thickness. The order matters: gel and strokes first to build the hairs, powder last to fill space between them. Stacking thin layers of different textures looks far more like genuine density than piling on one heavy product, which always flattens into an obvious painted shape.
Set, Clean Up, and Soften
The finishing steps make brows look professionally done. Brush the brows up and into shape, then set them with a clear or tinted brow gel so the hairs stay lifted and your strokes do not smudge through the day; lifting the hairs also creates the illusion of more fullness. Sharpen the look by cleaning the edges with a tiny bit of concealer on a small brush around the brow, which carves a crisp shape and instantly looks tidier. Then, crucially, soften: take a clean spoolie and brush back through the brow to blend any harsh strokes so nothing looks stamped on. This final brush-through is what turns defined brows into natural ones. A touch of brow gel on top locks everything down so your sparse-but-now-full brows last through the day without fading or moving.
Preview Shapes That Suit Your Face
Because brow shape dramatically changes how your whole face reads, it pays to know which fullness and arch flatter you before committing to a routine or, especially, any semi-permanent treatment. You can upload a selfie to GlowMaxing and preview different brow shapes and densities to see how a softer arch, a straighter brow, or fuller tails suit your features. That takes the guesswork out of whether you should aim for bolder, more defined brows or a softer natural fill. Knowing your ideal shape also tells you exactly where to concentrate your strokes and where to leave brows lighter. Once you have identified the shape that balances your face, filling becomes faster and far more flattering, and you avoid the common trap of over-defining brows in a shape that fights your natural bone structure.
The quick checklist
- Map your start, arch, and end points before adding product
- Go one to two shades lighter than dark hair to avoid harshness
- Draw short hair-like strokes that follow natural growth direction
- Brush on a tinted gel first to instantly coat and thicken thin hairs
- Layer gel, strokes, then powder for realistic density
- Clean the edges with concealer for a crisp, tidy shape
- Brush back through with a spoolie to soften any harsh strokes
✦ Free to start✨ Try these looks on your own selfie with GlowMaxing →Upload one selfie and try any hairstyle, color or makeup look instantly with AI. Free to start.Download on theApp Store