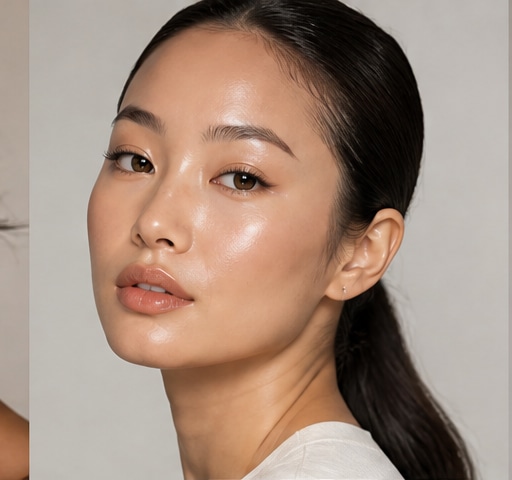
 Try this styleon your selfie · free
The Right Way to Apply Bronzer for a Natural Sun-Kissed Look
Published June 22, 2026
Where the sun actually hits and how to place bronzer so it warms your face instead of muddying it.
Pick the Right Shade and Formula
The single most common bronzer mistake is choosing one that is too dark or too orange. Your bronzer should be only one to two shades deeper than your natural skin tone, with a neutral-to-warm undertone rather than a heavy orange or red. Anything darker reads as a stripe instead of sunlight. Finish matters too: a matte or soft satin bronzer looks the most natural because real sun warmth is not glittery, though a subtle sheen is fine. Cream and liquid formulas melt into the skin for a seamless, lived-in glow and work beautifully on dry or mature skin, while powders suit oily skin and give more control. For the most believable result, a deeper skin tone needs a richer bronzer with warmth, while fair skin should stay soft and avoid muddy browns that look like dirt rather than a tan.
Know Where the Sun Hits
Natural-looking bronzer follows the logic of actual sunlight, which falls on the high points of the face: the forehead near the hairline, the temples, the tops of the cheekbones, the bridge and tip of the nose, and along the jaw. Picture a soft number three traced from your temple, curving in along your cheekbone, and back out along your jaw on each side of your face. That is the path. Avoid dragging bronzer straight into the hollows of your cheeks, which is contouring, a different and cooler effect. Bronzer is meant to warm and bring forward, not to carve shadow. A light dusting across the forehead and a tap on the nose ties everything together so your face looks evenly kissed by the sun rather than randomly patched with color.
Use the Right Brush and Touch
Tools make or break a natural finish. For powder bronzer, use a soft, slightly tapered or domed brush that deposits color in a diffuse way rather than a dense flat brush that drops too much pigment at once. Always tap off the excess before touching your face, and build in thin layers. It is far easier to add more than to scrub off a heavy application. For cream or liquid bronzer, a damp makeup sponge or a dense buffing brush presses the product into the skin for a melted, second-skin look. Use circular, feather-light motions and keep blending until there is no visible edge where the bronzer starts and stops. The moment you can see a defined line of color, you have either used too much or stopped blending too soon. Patience here is everything.
Blend, Build, and Balance
Sun-kissed is all about seamlessness. After your first light layer, step back and look at your whole face in good lighting before adding more. Build intensity gradually only where you want the most warmth, usually the cheekbones and temples. Once your bronzer is placed, add a warm blush on top of the cheekbones for a healthy flush, because bronzer alone can look flat or muddy without a pop of color over it. A touch of warm, golden highlight on the very top of the cheekbones above the bronzer adds dimension and that lit-from-within glow. Keep your blush and highlight in the same warm family as your bronzer so everything harmonizes. If your face starts to look uniformly tan and lifeless, that pop of blush is almost always the missing piece.
Avoid the Common Mistakes
A few errors instantly give bronzer away. Applying it all over the face like foundation makes you look uniformly muddy rather than sun-kissed, so keep it to the high points. Using a shade that is too orange creates an unnatural tint, especially noticeable at the jawline where it meets your neck. Forgetting to blend down into the neck leaves a visible line between a bronzed face and a paler neck, so always sweep a little bronzer down past the jaw. Applying too much at once is hard to fix, so always build slowly. Finally, skipping blush on top leaves the face looking dull. If you remember nothing else, remember that bronzer warms the high points and blush brings life, and the two together create that healthy, just-back-from-vacation look.
Match It to Your Face Before You Buy
Because the right bronzer is so tied to your specific undertone and the high points of your particular face shape, it helps to preview placement before committing to a product or a technique. You can upload a selfie to GlowMaxing and try a warm, sun-kissed bronzer effect to see how a given depth and placement reads on your own features. That makes it easy to judge whether you need a warmer or cooler tone and where the color flatters your bone structure most. Once you know your shade family and your number-three path, real-life application becomes a quick, confident two-minute step rather than a guessing game. The aim is a glow that looks like it came from a weekend outdoors, not from a heavy hand at the makeup mirror.
The quick checklist
- Stay one to two shades deeper than your skin with a neutral-warm tone
- Trace a soft number three: temple, cheekbone, then jaw
- Avoid the hollows of the cheeks, that is contour not bronzer
- Tap off excess and build in thin layers
- Use a tapered brush for powder or a damp sponge for cream
- Always blend a little down into the neck to avoid a line
- Add warm blush on top so the face does not look flat
✦ Free to start✨ Try these looks on your own selfie with GlowMaxing →Upload one selfie and try any hairstyle, color or makeup look instantly with AI. Free to start.Download on theApp Store