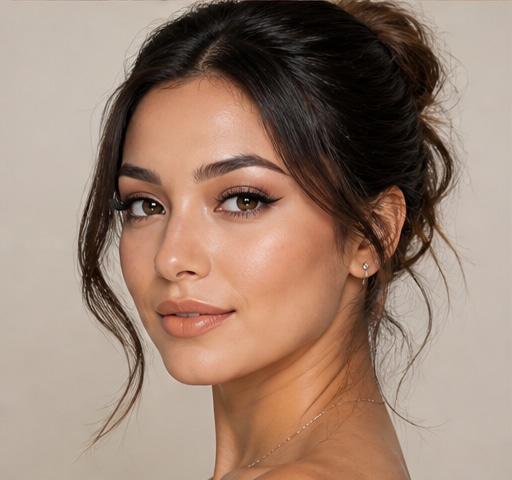
 Try this styleon your selfie · free
How to Apply Cream Products With Just Your Fingers
Published September 2, 2026
Your fingers are the warmest, most precise blending tool you own — here's how to use them for a glowy, second-skin finish.
Why Fingers Beat Brushes for Creams
For cream and liquid products, your fingertips are genuinely one of the best tools you have, and not just because they're free. Body heat warms cream blush, bronzer, and foundation as you work, melting the product into your skin so it grips and blends seamlessly instead of sitting on top. Fingers also give you tactile feedback, you can feel exactly how much product is on the skin and where it's building up, which brushes can't tell you. The natural oils on your fingertips help sheer out and diffuse color for that lit-from-within look that's defined makeup for the last few years. The one rule before you start: wash your hands. You're about to press your fingers all over freshly cleansed skin, and dirty hands undo your skincare and can trigger breakouts. Clean hands, warm touch, and you're set.
Foundation and Skin Tint
Start with the smallest amount you think you need, because cream and liquid base build easily but get cakey if overdone. Dot a few small drops across your forehead, cheeks, nose, and chin, then work fast before it sets. Use the flat pads of your middle and ring fingers, your gentlest fingers, to press and tap the product into the skin rather than dragging it, which keeps coverage even and avoids streaks. Blend outward from the center of your face, where you usually want the most coverage, fading toward the hairline and jaw. For trouble spots, layer a second thin tap of product instead of piling it on in one go. Finish by pressing your palms over your face for a few seconds; the warmth helps everything meld. This technique gives a natural, skin-like finish that looks like your own skin, only better.
Cream Blush, Bronzer, and Highlight
Cream cheek products are where fingers truly shine. For blush, dab a little onto the back of your hand first to control the amount, then tap your fingertip into it and press it onto the apples of your cheeks, blending up toward your temples with light bouncing motions. The trick is to build slowly: it's far easier to add another layer than to remove a clown stripe. Apply cream bronzer the same way along your hairline, temples, and under the cheekbones for warmth, and cream highlight on the high points, tops of cheekbones, brow bone, and a dot on the cupid's bow. Always blend the edges so there are no visible lines. Because all three are creams, they layer beautifully and melt together, giving a dewy, dimensional finish that powder simply can't replicate when applied this way.
Cream Eyeshadow and Color on Lids
Fingertips are perfect for a quick, glowy lid. Swipe a small amount of cream shadow or even your cream blush onto your ring finger, then gently pat, don't swipe, it across the lid, starting at the lash line and working up. Patting deposits color evenly and prevents the product from sliding into the crease. For a wash of color, one layer is enough; for more intensity, press on a second once the first has set slightly. Use the warmth of your finger to diffuse the edges into a soft, blurred halo rather than a hard line. This is the fastest route to the monochrome 'one product on eyes, cheeks, and lips' look. Just set cream shadow with a translucent powder or a matching matte shadow if your lids get oily, since creams crease faster on warm, mobile eyelids than on cheeks.
Lips and the Monochrome Finish
To complete a finger-only face, dab your cream blush or a creamy lip product onto your lips with your fingertip, pressing it into the center and blending outward for a soft, stained edge rather than a sharp line. This blurred, bitten-lip effect is effortless and modern, and using the same product you put on your cheeks ties the whole face together in a coordinated flush. Build the color in thin layers, blotting between if you want it to last. The beauty of the all-fingers approach is speed and cohesion: in under five minutes you can have glowy skin, flushed cheeks, soft lids, and a tinted lip, all melted into your complexion with nothing but your hands. It's the most travel-friendly, low-tool routine there is, and it consistently looks more natural than the same products applied with brushes.
Clean-Up, Setting, and Common Mistakes
A few habits make finger application foolproof. First, work in good light and check your blending from multiple angles, because creams can hide unblended edges until you step into the sun. Second, set only the areas that need it, your T-zone or oily lids, with a light dusting of translucent powder, and leave the rest dewy. Over-powdering kills the glow that fingers gave you. Third, the most common mistake is using too much product, so always start small. If you go overboard, press a clean damp sponge over the area to lift excess and re-blend. Before a big event, you can preview how a soft, finger-blended monochrome look reads on your own selfie with GlowMaxing so you know the finish suits you. Keep your hands clean throughout, and reach for a fresh fingertip when switching products to avoid muddying colors.
The quick checklist
- Wash your hands before touching freshly cleansed skin
- Press and tap product in rather than dragging it
- Start with less than you think and build in thin layers
- Use your ring finger for the most delicate areas like lids
- Tap cream blush onto lips too for a coordinated flush
- Warm your palms over your face to help base products meld
- Set only oily zones so the rest stays dewy
✦ Free to start✨ Try these looks on your own selfie with GlowMaxing →Upload one selfie and try any hairstyle, color or makeup look instantly with AI. Free to start.Download on theApp Store