 Try this styleon your selfie · free
How to Apply Highlighter for a Natural Glow
Published August 9, 2026
A natural glow comes from placing highlighter only where light actually hits and choosing the right formula and shade for your skin.
Where Light Naturally Hits the Face
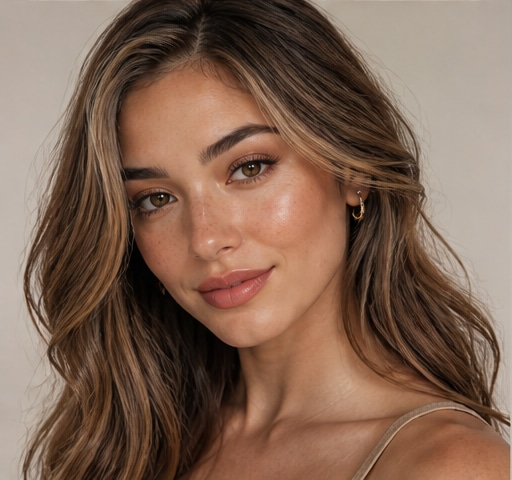
Natural-looking highlighter is all about placement, you're mimicking where sunlight would naturally catch your face, not coating everything in shimmer. The classic high points are the tops of the cheekbones, the brow bones, the inner corners of the eyes, the bridge and tip of the nose, and the cupid's bow above the lips. A tiny touch on the center of the chin and the middle of the forehead can add dimension for some faces. The trick to keeping it believable is restraint and precision: a thin line along the very tops of the cheekbones, not the whole cheek, reads as natural radiance, while highlighter spread too low or too wide looks greasy. Think of it as tracing the highest planes of your face, the places that would shine if you tilted toward the sun.
Choosing the Right Formula
Formula choice shapes how natural your glow looks. Liquid and cream highlighters melt into skin for a lit-from-within, skin-like glow, ideal for dry skin, dewy looks, and anyone who wants subtle radiance rather than visible shimmer, you can even apply them under foundation for an internal glow. Powder highlighters give more control and a stronger, longer-lasting shine, and they layer easily over powder products without disturbing them, which suits oily skin and bigger occasions. For the most natural everyday effect, finely milled formulas with a soft sheen beat chunky, glittery ones, which can look harsh and sit on top of the skin. Match the highlighter's texture to your base: cream over cream or bare skin, powder over a powdered face, so the two blend seamlessly instead of separating or looking patchy.
Picking a Shade for Your Skin Tone
The right highlighter shade makes the glow look like it's coming from your skin rather than sitting on top of it. Fair skin tends to look most natural with pearl, champagne, and soft pink-toned highlighters. Medium and olive skin glows with gold and warm champagne tones. Deep skin comes alive with rich gold, bronze, and copper highlighters, which read luminous rather than ashy. The general rule is that warmer, deeper skin wants warmer, deeper highlight tones, while cooler, fairer skin can carry cooler pearl and silver-pink shades. Avoid anything too white or too frosty for your depth, it's the main culprit behind a chalky, obvious highlight. When the shade harmonizes with your undertone, the glow looks like healthy, well-rested skin catching the light rather than a stripe of product.
Application Technique for a Seamless Blend
Tools and technique determine whether your highlight glows or streaks. For powder, use a small fluffy or fan brush and build gradually with a light hand, one soft pass first, then more only if needed, since you can't easily remove an over-applied highlight without disturbing your base. For cream and liquid, tap and press it in with a clean fingertip or a damp sponge, which warms the product and melds it into skin for that seamless, from-within look. Always blend the edges so there's no hard line where the highlight stops. Apply highlighter after blush and bronzer so it sits as the final luminous layer on top. The golden rule is less is more: you can always add another whisper, but a heavy hand instantly tips natural radiance into obvious, sweaty-looking shine.
Common Mistakes That Kill a Natural Glow
A few habits separate a natural glow from an artificial one. Using too much product is the biggest, a heavy hand reads as greasy and emphasizes texture and pores rather than smoothing them. Choosing a chunky, glittery formula instead of a finely milled one makes the highlight look like craft glitter sitting on the surface. Placing highlighter too low on the cheek, near the apples or below, looks oily rather than sculpted, since light naturally hits the upper cheekbone. Skipping the blend leaves a visible stripe. And applying highlighter over a creasing, under-prepped base makes it cling to fine lines. Fix these by going light, choosing a soft-sheen formula, keeping placement high and precise, blending every edge, and prepping skin well first. Avoiding these five mistakes is most of what separates pro-looking glow from a costume shine.
Preview Your Glow Before Committing
Highlighter intensity is deeply personal, what reads as a subtle glow on one face looks like a beacon on another, and the flattering shade depends entirely on your undertone. Before investing in a new highlighter or going full glow for an event, it helps to see how different glow intensities and shade tones look on your own features, you can preview a dewy, highlighted look on a selfie in GlowMaxing to gauge how much radiance flatters your face and which warmth of highlight suits your skin. This is especially handy for deciding between a soft champagne and a richer gold, or between a barely-there glow and a strobed one. Seeing it first means you buy the shade that genuinely complements you and apply it with a confident, light hand, the two things that keep a glow looking natural.
The quick checklist
- Highlight only the high points: cheekbones, brow bones, inner eyes, nose bridge, cupid's bow
- Keep cheek highlight high and thin, never down near the apples
- Use cream and liquid for a skin-like glow, powder for control and longevity
- Match shade to depth: pearl for fair, gold for medium, copper for deep
- Press creams in with a fingertip or damp sponge for a seamless blend
- Apply highlighter after blush and bronzer as the final layer
- Build gradually with a light hand, since less is always more
✦ Free to start✨ Try these looks on your own selfie with GlowMaxing →Upload one selfie and try any hairstyle, color or makeup look instantly with AI. Free to start.Download on theApp Store