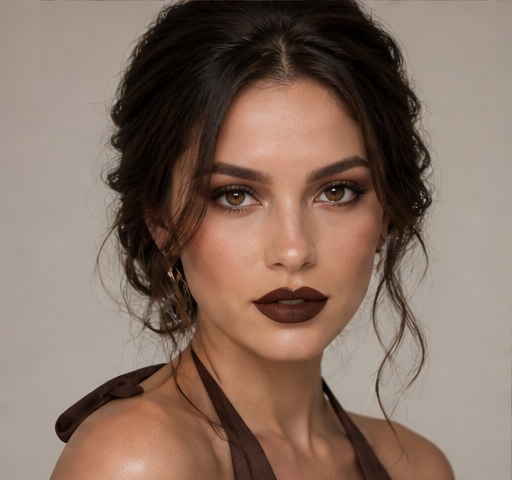
 Try this styleon your selfie · free
How to Blend Eyeshadow Like a Professional
Published September 26, 2026
Seamless, gradient eyeshadow comes down to brush choice, the right base, and a transition shade most people skip.
Start With the Right Brushes
Blending is mostly a tool problem before it's a skill problem. You need at least three brushes: a flat, dense brush to pack color onto the lid, a fluffy tapered crease brush for transition shades, and a clean, soft 'blending' brush you never load with product, reserved only for diffusing edges. The dense brush deposits pigment; the fluffy brushes move it. Most beginners try to do everything with one medium brush, which is why their color sits in a hard stripe. Buy brushes with soft, slightly long bristles for the crease; stiff, short bristles can't feather color into a gradient. Keep a couple of clean fluffy brushes within reach during application so you're always finishing with bare bristles. If you invest in nothing else, a single excellent fluffy blending brush will improve your results more than any new palette.
Always Prime the Lid
Eyeshadow blends, grips, and lasts dramatically better over a primed lid. Apply a dedicated eye primer or a thin layer of concealer set with a translucent powder across the whole lid up to the brow bone. This does two things: it creates a smooth, slightly tacky surface that catches pigment evenly, and it gives you a neutral canvas so colors show true instead of fighting your natural lid tone or veins. Set the primer with powder before any shadow; a tacky-but-set base lets shadow move under your brush without grabbing in patches. A light dusting of a neutral transition-toned powder over the primer makes the very first blending strokes glide. Skipping this step is the single most common reason shadow creases by midday and refuses to diffuse no matter how much you buff. Thirty seconds of prep changes everything that follows.
Build in Thin Layers From Light to Dark
Professionals build color slowly, and that patience is the secret to a smooth gradient. Tap, never grind, a small amount of product onto your brush and knock off the excess so you control deposit. Start with your lightest shade across the lid, then place your transition shade in the crease, then deepen gradually. Working light to dark means you can always add more, but you can rarely take dark color back without starting over. Use windshield-wiper motions in the crease, sweeping side to side along the socket line rather than circles, which keeps the color in a clean band you can then soften upward. Each pass should add just a little. If you reach for a dark shade and slam it on, you'll spend ten minutes diffusing a harsh edge. Three thin layers blend; one thick layer streaks.
The Transition Shade Is Non-Negotiable
The step that instantly separates amateur from professional results is a transition shade: a soft, matte color one or two tones deeper than your skin, placed in the crease before any real color goes down. It acts as a buffer zone so your lid color fades into bare skin gradually instead of stopping abruptly. Choose a muted, neutral tone like a soft tan on fair skin, a warm caramel on medium, or a deep neutral brown on deep skin. Apply it with your fluffy crease brush in light layers slightly above your natural crease, blending the top edge into nothing. Every darker shade you add afterward gets buffed into this transition color, which is why the final result looks like a seamless gradient. Without it, even expensive shadows look like flat patches. With it, cheap shadows can look professionally diffused.
Diffuse Edges With a Clean Brush
Once your colors are placed, the final magic is a clean fluffy brush used in light, feathery motions only at the edges where two shades meet. The bare bristles pick up the tiniest amount of pigment and drag it a hair's width further, erasing any visible line. Use almost no pressure; you're caressing the edge, not scrubbing. Focus on the top of the crease where color meets brow-bone skin, and on the outer corner where the deepest shade can otherwise look like a hard blob. If at any point an edge looks too soft or muddy, you've over-blended, so go back and re-pack a little color in the center to restore intensity, then re-diffuse only the perimeter. Keeping intensity in the center and softness at the edges is the whole formula. Want to test a full eye look on your features first? You can preview makeup on your selfie in GlowMaxing before you pick up a brush.
Clean Up and Set the Result
Fallout and sharp lines are inevitable, so finish like a pro by cleaning up. Before shadow, you can tap loose powder under your eyes to catch fallout and brush it away after. To sharpen the lower edge of your lid color, run a flat concealer line just beneath it and blend outward, which both cleans the edge and lifts the eye. Set everything with a final light pass of your clean blending brush to marry the layers. If your inner corner needs brightness, a tiny touch of a light shade there opens the whole eye and balances the gradient. Done correctly, the finished eye should have no detectable starting or stopping point for any color; it should look like a smooth wash that simply deepens toward the outer corner. That gradient, not the boldness of the colors, is what reads as professional.
The quick checklist
- Use separate brushes for packing, blending, and a clean diffusing brush
- Prime and set the lid before any shadow for grip and true color
- Always apply a transition shade in the crease before darker tones
- Build color in thin layers, working light to dark
- Use windshield-wiper motions in the crease, not circles
- Diffuse only the edges with a clean, product-free brush
- Keep intensity in the center and softness at the perimeter
✦ Free to start✨ Try these looks on your own selfie with GlowMaxing →Upload one selfie and try any hairstyle, color or makeup look instantly with AI. Free to start.Download on theApp Store