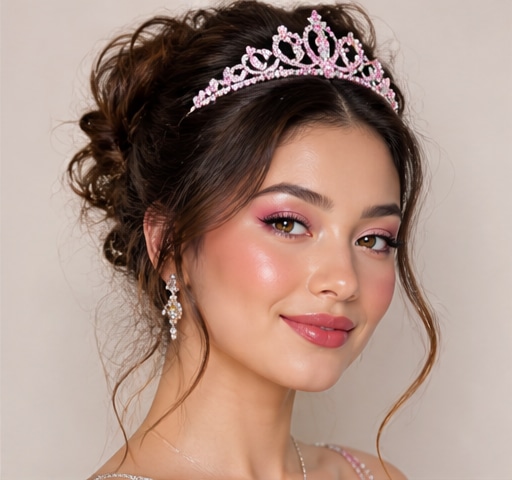
 Try this styleon your selfie · free
How to Create a Messy Bun That Looks Effortless on Purpose
Published August 1, 2026
The 'I-woke-up-like-this' bun is actually a five-step technique — here's how to fake effortless and make it stay put.
Start With the Right Texture, Not Clean Hair
The biggest secret to a great messy bun is that it should never be built on freshly washed, slippery hair. Day-two or day-three hair has natural grip and grit that holds shape and gives that lived-in look automatically. If your hair is squeaky clean, fake the texture: mist dry shampoo or a texturizing spray through the mid-lengths and roots, then scrunch with your hands. For very fine or silky hair, a tiny bit of dry texture spray at the roots adds the friction pins need. You want hair that feels slightly matte and 'tacky,' not sleek and shiny. This single prep step is the difference between a bun that collapses in twenty minutes and one that looks intentionally undone all day — texture is what holds the messy in place.
Choose Your Height and Placement
Where you sit the bun completely changes the vibe. A high bun near the crown reads youthful, playful, and lifts the face — great for round faces and casual days. A low bun at the nape is softer, more romantic, and more polished, flattering longer and heart-shaped faces. A mid-height bun is the safe, universally flattering middle ground. To find the natural sweet spot, tip your head forward and let your hair fall — wherever it gathers is often the most comfortable, secure placement. Avoid the awkward 'exactly horizontal back of the head' zone, which tends to look like an afterthought. Decide placement before you gather, because re-doing it stretches out your elastic and your patience, and a re-tied bun loses its first-attempt freshness.
The Loose Ponytail Foundation
Gather your hair into a ponytail at your chosen spot, but leave it deliberately loose — don't yank it tight against your scalp. Pull out a few face-framing pieces at the temples and nape first; these soft tendrils are what sell the effortless look, so do this before you secure anything. On the final loop of your hair tie, only pull the hair halfway through to create a folded loop, or wrap it fully if you prefer a tighter base. The ponytail is your anchor, so use a sturdy elastic that matches your hair color. Resist the urge to smooth every bump — a little unevenness here is exactly what you want. A too-perfect ponytail base makes the finished bun look stiff rather than charmingly undone.
Twist, Wrap, and Pin Loosely
Now build the bun itself. Loosely twist the ponytail, then coil it around the base — but don't wind it tight. As you wrap, let it sit a little slouchy and irregular. Secure with bobby pins pushed in toward the scalp and angled against the direction of the bun for grip; two to four well-placed pins hold better than a dozen surface ones. For extra security on heavy hair, cross two pins in an X under the bun. Then comes the magic step: gently tug small loops of hair outward from the bun to loosen and expand it, creating that soft, full, balloon-like shape. Pull a few pieces free here and there. The goal is a bun that looks like it happened by accident, not one you fought into submission.
Customize for Your Hair Type
A messy bun is endlessly adaptable, but the technique shifts by hair type. Fine or thin hair benefits from teasing the ponytail before wrapping to add bulk, and from a hair donut or a small foam ring tucked inside for fullness. Thick or long hair may need to be twisted into two sections and wrapped separately so the bun isn't comically large — or braid the ponytail first for a more controlled, textured coil. Curly and coily hair makes the most naturally effortless bun of all; simply gather, twist gently, and pin, letting the curls do the volumizing. Short or layered hair will shed pieces — embrace it, and pin the loose front sections back as part of the look rather than fighting to contain them.
Set It and Troubleshoot Common Fails
Finish with a light mist of flexible-hold hairspray, scrunching gently so it sets the shape without crunch. If your bun keeps sliding down, your hair was too clean or your pins are sitting on the surface instead of biting into the scalp anchor. If it looks more 'unmade bed' than 'effortless chic,' you over-tugged — start again with a tidier base and loosen more conservatively. If face-framing pieces droop flat, a quick bend with a curling iron or a twist around your finger revives them. Want to know whether a high or low bun suits your face before you commit? Preview both on a selfie with GlowMaxing and pick the one that genuinely flatters your shape. Keep a couple of spare pins handy for midday rescues.
The quick checklist
- Build on day-old hair, or fake grit with dry texturizing spray
- Pull out face-framing tendrils before you secure anything
- Keep the ponytail base loose, never scalp-tight
- Anchor with 2–4 pins angled toward the scalp, not surface pins
- Tug small loops outward to expand the bun into a full, soft shape
- Tease fine hair or use a foam donut for extra volume
- Finish with flexible hairspray, scrunched in for hold without crunch
✦ Free to start✨ Try these looks on your own selfie with GlowMaxing →Upload one selfie and try any hairstyle, color or makeup look instantly with AI. Free to start.Download on theApp Store