 Try this styleon your selfie · free
How to Create a Gradient Lip the Korean Way
Published August 23, 2026
The blurred, just-bitten gradient lip looks effortless because the technique is — once you know the three-step trick.
What a Gradient Lip Actually Is
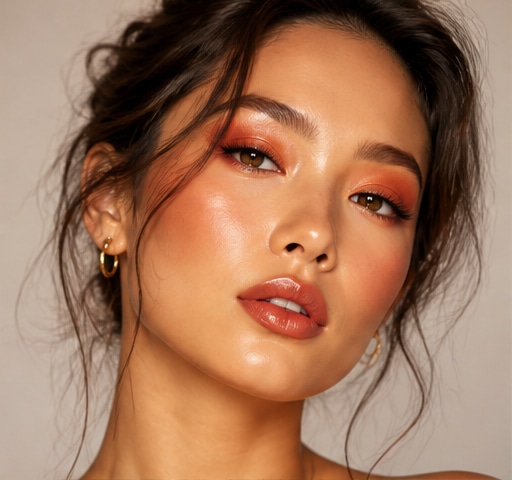
The Korean gradient lip — sometimes called a 'blurred' or 'bitten' lip — concentrates color in the center of the mouth and fades it softly toward the edges, leaving the outer lip line undefined. The effect looks fresh, youthful, and like you naturally have a flush of color from the inside out, rather than a precise, fully-painted lip. It pairs perfectly with the dewy, soft-glam Korean aesthetic: glowy skin, straight brows, and a wash of color rather than hard lines. The magic is in the diffusion — no visible border where lip color meets skin. It also has a practical upside: because the edges are blurred, it's far more forgiving than a full lip and wears down gracefully instead of leaving a harsh ring as it fades. Master the fade and you've mastered the look.
Prep Your Lips First
A gradient lip lives or dies on smooth lips, because patchy color in the center is impossible to hide. Start by gently exfoliating with a lip scrub or a damp washcloth to slough off any flakes, then apply a thin layer of balm and let it absorb for a minute. Blot away any excess so the surface is conditioned but not slippery — too much balm and your color slides and won't stay concentrated in the center. If your natural lip color is deep or uneven, lightly tap a bit of foundation or concealer over the entire lip and the outer edges. This mutes the natural lip line so your gradient fades into a neutral canvas, which makes the blur look seamless and the central color pop more cleanly. Smooth, slightly nude lips are the ideal starting point.
Building the Color From the Center Out
Now the core technique. Take your lip product — a tint, a creamy lipstick, or a stain works best — and apply it only to the inner portion of your lips, concentrating on the center where they touch. Press your lips together to transfer the color evenly. Then, with a clean fingertip or a small synthetic brush, gently pat and blend the edges outward so the color softens and diffuses toward the outer lip line, fading to nothing before it reaches the edge. The key word is pat, not swipe — patting diffuses while dragging creates streaks. Build in thin layers: apply, blot, blend, and repeat until the center is as saturated as you want. Liquid tints give the most natural, long-wearing gradient because they stain rather than sit on top, but a soft lipstick blended well looks just as good.
Choosing the Right Shade and Formula
Shade and formula make or break the effect. Reach for soft, slightly muted tones — rosy pinks, coral, berry, and brick reds read most naturally as a 'just bitten' flush; very dark or super-bright shades can look harsh once concentrated in the center. Velvet, water-tint, and creamy satin formulas blend beautifully because they're pliable. Avoid heavy, full-opacity matte sticks and high-shine glosses for the actual gradient: dense mattes are hard to diffuse without patchiness, and slippery glosses won't stay put in the center. You can absolutely add a tiny dot of clear or tinted gloss to the very center at the end for dimension and a plump look. If you're between shades, pick the one closest to a flushed, lived-in version of your natural lip color — it's the most foolproof.
Faking Fuller Lips With the Gradient
The gradient lip is secretly a plumping trick. Because the color sits in the center and fades out, it draws the eye to the fullest part of the mouth and makes lips look poutier. To amplify that, add a tiny dab of gloss or a lighter, shimmery shade right at the center of the lower lip — that central highlight catches light and reads as volume. Keep the outer edges soft and undefined; hard outer lines flatten the illusion. You can also overdraw very slightly at the center of the cupid's bow, but blend it so there's no visible line. If you want to see how different gradient shades and intensities suit your face before buying anything, you can preview the look on your own selfie with GlowMaxing and compare a rosy versus a coral center side by side.
Making It Last All Day
Gradient lips wear down gracefully, but a few steps extend that. Use a water or velvet tint as your base layer because it stains the lips, so even as the top texture fades, a soft wash of color remains — no harsh outline left behind. After building your gradient, blot once with a tissue and apply a second thin layer to lock pigment into the lips. Avoid over-glossing, since slip shortens wear. Throughout the day, you can simply pat a little more tint into the center to refresh without a mirror, because there's no precise line to recreate. That low-maintenance reapplication is exactly why this look became a daily staple — it's the rare lip that genuinely looks better as it softens than when it's first applied.
The quick checklist
- Exfoliate and balm lips, then blot so the surface is smooth, not slippery
- Mute your natural lip line with a little concealer for a seamless fade
- Apply color only to the center where your lips meet, then press together
- Pat the edges outward with a fingertip or brush — never swipe
- Choose rosy, coral, or berry tints in velvet or water-tint formulas
- Add a dot of gloss to the center for a fuller, dimensional look
- Use a staining tint as the base so it fades without leaving a hard ring
- Refresh by patting more color into the center — no mirror needed
✦ Free to start✨ Try these looks on your own selfie with GlowMaxing →Upload one selfie and try any hairstyle, color or makeup look instantly with AI. Free to start.Download on theApp Store