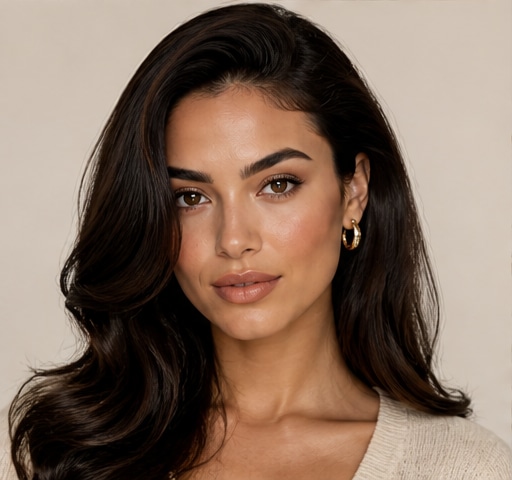
 Try this styleon your selfie · free
How to Do Balayage at Home Without Ruining Your Hair
Published July 3, 2026
Balayage is the most forgiving color technique to try at home, here's how to hand-paint sun-kissed dimension without the damage.
What Balayage Actually Is and Why It Forgives
Balayage means sweeping, and that's literally the technique: lightener is hand-painted onto the surface of the hair in soft, freehand strokes rather than saturated from root to tip in foils. That's exactly why it's the most beginner-friendly color to attempt at home. Because the lightener is heaviest at the ends and feathered softly higher up, there's no harsh regrowth line, mistakes blend instead of screaming, and it grows out gracefully over months. You're aiming for natural, sun-kissed dimension, not uniform blonde. The trade-off is that balayage lifts more gradually and may need a couple of sessions for a dramatic result, which is actually safer for your hair. Go in expecting subtle, lived-in brightness rather than a full transformation, and you'll get a result that looks intentional and expensive instead of obviously DIY.
Gather the Right Kit
You can't paint balayage with regular box dye, you need a lightening kit. Look for an at-home balayage or highlighting kit that includes lightening powder or cream, developer, a tint brush or the included applicator, and ideally a balayage board or even a piece of cardboard to paint against. Choose a developer strength wisely: 20 volume is the safe, standard choice for most people and lifts a few levels gradually, while 30 and 40 volume lift faster but cause far more damage and are easy to overdo. For a first attempt, 20 volume is your friend. Add a bond-building additive if your kit doesn't include one, since it dramatically reduces breakage during lifting. Also grab gloves, clips, a mixing bowl, and a toner or purple shampoo for afterward to kill any brassiness.
Section, Tease, and Place Your Pieces
Start with dry, unwashed hair, a little natural oil protects your scalp and helps the lightener glide. Part your hair as you normally wear it, then clip it into sections. The secret to natural-looking balayage is teasing, lightly backcomb the upper part of each section you're painting so the lightener fades softly at the top instead of creating a hard line. Place your brightest pieces where the sun would naturally hit: around the face, on the ends, and through the top layers. Less is more on the first pass; you can always add more, but you can't un-lighten. Use a mirror to check both sides for symmetry as you go. Work with thin sections so the product penetrates, and keep your strokes light and feathery rather than heavily saturated near the roots.
Paint, Watch the Clock, and Protect Your Hair
Apply the lightener with sweeping downward strokes, heaviest at the ends and feathering upward, painting onto a board for control. Once everything's painted, the most important rule is to watch it develop, balayage isn't a set-it-and-forget-it timer game. Check a strand every five to ten minutes by wiping the lightener off with a tissue to see the true level. Stop when you reach a pale yellow, not white, since you'll tone afterward, and never exceed the developer's maximum time, usually around 45 minutes. The single biggest cause of ruined home balayage is leaving lightener on too long chasing platinum, which fries the hair. If you started dark, accept a warmer result this round and lift again another day. Rinse thoroughly the moment any section hits your target, even if others need slightly longer.
Tone, Deep Condition, and Assess
Freshly lightened hair almost always looks brassy or yellow, and toning is what turns it from DIY-orange to salon-soft. After rinsing out the lightener, apply a toner if your kit includes one, or use a purple or blue shampoo to neutralize yellow and orange. Purple cancels yellow, blue cancels orange, so choose based on what you're seeing. Leave it on only as directed, since over-toning can leave hair looking gray or muddy. Follow immediately with a deep-conditioning mask, lightening is dehydrating, and your hair needs that moisture back to look healthy and reflective. Before you commit to the whole head, it's smart to preview the finished sun-kissed look on a selfie in GlowMaxing so you can confirm the placement and brightness suit your face. Then assess in daylight and decide whether you want a second, lighter pass later.
Aftercare to Keep It Healthy
Lightened hair is more porous and fragile, so your aftercare routine is what keeps this from turning into the breakage horror stories. Switch to a sulfate-free, color-safe shampoo and wash only two or three times a week to preserve both moisture and tone. Use a purple shampoo once a week to keep brassiness at bay between sessions. Make a weekly deep-conditioning mask or bond-building treatment non-negotiable, your lightened ends will drink it up. Minimize heat styling, and always use a heat protectant when you do, since damaged hair burns far more easily. Get a small trim to clean up any stressed ends, which instantly makes the color look fresher. Done right, at-home balayage can look fantastic for months, but the health of your hair afterward is entirely down to how consistently you nourish it.
The quick checklist
- Use a dedicated lightening kit, never regular box dye, for balayage
- Choose 20 volume developer for the safest, most gradual lift
- Tease the top of each section so color fades softly with no hard line
- Paint brightest pieces around the face and on the ends where sun hits
- Watch development by wiping a strand every 5 to 10 minutes; stop at pale yellow
- Tone with purple shampoo for yellow or blue for orange to kill brassiness
- Deep condition weekly and add a bond builder to prevent breakage
✦ Free to start✨ Try these looks on your own selfie with GlowMaxing →Upload one selfie and try any hairstyle, color or makeup look instantly with AI. Free to start.Download on theApp Store