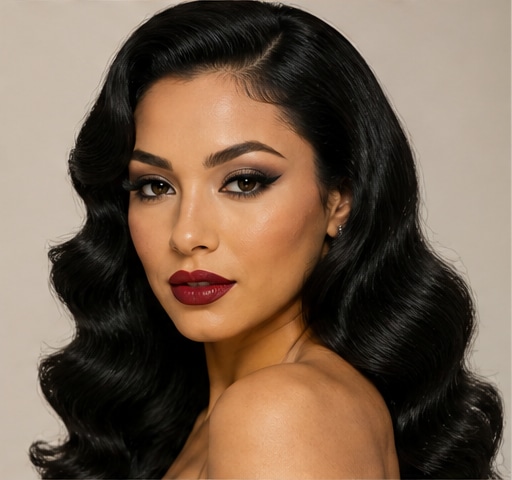
 Try this styleon your selfie · free
How to Do a Cut Crease Eyeshadow Step-by-Step
Published July 25, 2026
The high-impact eye look that makes your lid pop like a spotlight — broken down so anyone can nail it.
What a Cut Crease Is and Who It Suits
A cut crease is an eye look where you carve a sharp, defined line along the crease so the lid color looks crisp and separated from the deeper shade above it. The effect is a clean break that makes the eyelid appear bigger, brighter, and almost spotlit — which is why it photographs so dramatically. The technique flatters hooded and deep-set eyes especially well because the cut artificially lifts and opens the lid, but it works on almost any eye shape once you adjust placement. There are two main styles: a soft cut crease, where the line is blended and wearable for day, and a sharp graphic cut crease for full glam. It looks intimidating, but it's really just a sequence of layered steps, and the concealer cut is far more forgiving than it appears.
Prep and Mapping Your Crease
Start with primed lids so nothing creases or fades; an eye primer or a thin layer of concealer set with powder gives shadow something to grip. Before any color, map your eye open, looking straight into the mirror, because your crease shifts when you look down. Gently tap your shadow brush where your natural socket sits to find the line you'll be cutting — for hooded eyes, place it slightly above the visible fold so the cut shows when your eyes are open. Decide how high and how winged you want the shape now, since this dictates everything that follows. A common beginner mistake is mapping the crease while looking down, which puts the line too low and hides the whole effect. Take thirty extra seconds to map with your eyes open; it changes the entire result.
Building the Transition and Crease Shade
Before you cut anything, you build the depth above the cut. Using a fluffy blending brush and a matte transition shade a touch deeper than your skin, windshield-wiper the color through and slightly above your mapped crease. This is the most important step for a believable, dimensional eye — it stops the cut from looking like a harsh stripe. Layer a deeper matte on top, concentrating it at the outer corner to add drama, and blend the top edge so there's no hard line fading into the brow bone. Use a light hand and build gradually; you can always deepen, but over-applying mattes makes them patchy. Take your time blending here, because once you lay down the concealer cut, this transition is what frames the crisp lid and sells the whole look as polished rather than amateur.
Cutting the Crease
Now the signature move. Take a flat concealer brush, dip it in a creamy concealer or a dedicated cut-crease product, and draw a clean line right along your mapped crease, slicing straight through that transition color you built. Drag the concealer down to cover the entire lid in one smooth sweep — this both creates the sharp cut and acts as a base that makes your lid shade pop. Keep the brush edge crisp on top and clean up any wobble with a tiny bit of concealer on a flat brush. Work one eye fully before the other so the wet concealer doesn't dry unevenly. The sharper you want the look, the cleaner this top edge needs to be; for a softer daytime version, lightly blend just the upper edge of the concealer line.
Lid Color, Liner, and Finishing
While the concealer is still slightly tacky, press your lid shade on with a flat brush, patting rather than swiping so the color stays dense and vibrant — metallics and bright shades look incredible here against the clean base. Build it right up to your cut line. Add a touch of the same shade or a shimmer to the inner corner to brighten. Finish with a winged liner that connects to the outer point of your cut for that lifted, cohesive shape, then curl lashes and add mascara or falsies. If you want to test whether a soft or sharp cut crease suits your eye shape before committing your morning to it, you can preview the look on your own selfie with GlowMaxing first. Clean up under the eye, add lower lash shadow if you like, and you're done.
Troubleshooting Common Problems
If your cut line looks fuzzy, your concealer brush is too soft or overloaded — use a stiffer flat brush with less product and a steadier hand. If the lid color looks patchy, you swiped instead of patting, or the concealer dried before you applied shadow; work faster and press the color in. If the whole look reads harsh, you skipped or skimped on the transition shade, so go back and blend more depth above the cut. For hooded eyes that hide the lid, map and cut higher so the color stays visible when your eyes are open. And if the cut smudges by midday, you didn't set the concealer — a light dusting of translucent powder over the lid before the shadow locks everything in place for hours.
The quick checklist
- Prime lids and map your crease with eyes open, not looking down
- Build a blended transition shade before you cut anything
- Use a flat concealer brush for the sharpest cut line
- Pat lid color on rather than swiping for dense payoff
- Work one eye fully before starting the other
- Connect a winged liner to the outer point of the cut
- Set the concealer with powder so the look doesn't smudge
✦ Free to start✨ Try these looks on your own selfie with GlowMaxing →Upload one selfie and try any hairstyle, color or makeup look instantly with AI. Free to start.Download on theApp Store