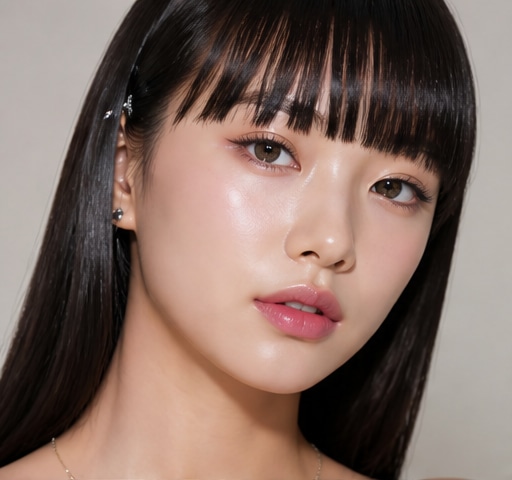
 Try this styleon your selfie · free
How to Overline Lips for a Fuller Pout (Without Looking Obvious)
Published July 7, 2026
The subtle, believable overlining technique that adds volume where it counts, no clownish outline required.
The Golden Rule of Believable Overlining
Overlining works only when it respects your natural lip shape. The mistake that makes overlining look obvious is drawing a brand-new, bigger lip far outside your real border, which creates a visible gap of bare skin between your natural line and the makeup. The believable approach is to extend just barely past your true lip line, roughly one to two millimeters at most, and only in strategic spots rather than all the way around. Think enhancement, not reinvention. Your natural lip line should still be doing most of the work, with the overlining quietly filling and rounding it out. Good overlining is invisible; people should think you have naturally full lips, not that you drew them on. Keep that one to two millimeter ceiling in your head and you'll avoid every classic overlining fail before you even pick up your liner.
Pick the Right Liner Shade
Shade choice is what separates natural overlining from the obvious kind. Use a lip liner that matches your natural lip color or sits just one shade deeper, never a liner darker than your lipstick, which creates a harsh ring as the color wears off. A nude or rosy liner close to your own lip tone blends seamlessly and forgives small imperfections. If you're pairing it with a bold lipstick, choose a liner in the same color family so the transition is invisible. A creamy, blendable liner is far easier to work with than a hard, dry pencil, which can look stark and skip over the skin. Sharpen it to a fine point for precision around the cupid's bow. The right shade means that even up close and as the day goes on, there's no obvious outline, just a soft, full-looking lip.
Overline the Strategic Zones, Not the Whole Lip
You don't overline everywhere, you target the spots that read as fullness. The most impactful zones are the cupid's bow on the top lip and the center of the bottom lip. Slightly accentuating and lifting the peaks of the cupid's bow makes the top lip look plumper and more defined. Building out the center of the bottom lip adds that pillowy, pouty look. Leave the corners of your mouth alone; overlining into the corners looks unnatural and ages the lip. So your map is simple: gently extend the two peaks and the dip of the upper lip, and the central third of the lower lip, then taper back to your natural line toward the corners. This selective approach creates the illusion of volume exactly where the eye expects it, while keeping the overall shape grounded in your real lips.
The Step-by-Step Application
Start with prepped, balm-blotted lips so the liner glides without dragging. Smile slightly to find your natural border, then use tiny, light, feathered strokes just outside it in your target zones, building gradually rather than drawing one bold line. Define the cupid's bow first with a soft 'X' or 'V' shape over the peaks, then connect down to the center. Build out the lower lip's middle. Once your outline is set, fill the entire lip in with the same liner, this anchors the new shape and gives lipstick something to grip. Apply your lipstick on top, then take a clean fingertip or a small brush and gently blend the very edge to soften any hard line. A tiny dab of light gloss or a lighter shade in the center of the lips adds dimension and reflects light, enhancing the fullness even more.
Blend, Soften, and Pressure-Test the Look
The blending step is what makes overlining undetectable. After lipstick, run a clean cotton swab or fingertip lightly along the outer edge to diffuse the line so there's no sharp boundary between lip and skin. Check your work in natural light and from a few angles, including a quick selfie, because harsh bathroom lighting hides edges that daylight reveals. If you spot any obvious gap or hard line, soften it with your finger or a touch of concealer to clean up. You can also preview a fuller-lip look on your own selfie with GlowMaxing first to find the shade and shape that suits you before you commit. The final test: lips together, smile, talk. If the shape still reads as natural and the line stays soft, you've nailed it. If it looks drawn-on, scale the extension back closer to your real border.
Make It Last and Avoid the Tell-Tale Fade
Overlining can betray itself as the day wears on, leaving a ghost line outside faded color, so longevity matters. Because you've filled the whole lip with liner, you already have a stain-like base that fades evenly. To reinforce it, blot your lipstick, dust a whisper of translucent powder, and reapply a thin second coat. Avoid super-glossy formulas for all-day wear, since they migrate and can smear your extended edges; a soft satin or matte holds the shape better. For touch-ups, refresh the liner edge in your target zones rather than reapplying everywhere. And keep your expectations honest, overlining adds a believable boost, not a dramatic transformation; chasing extreme volume is exactly what tips the look into obvious territory. Subtle, well-blended, and evenly faded is the goal that keeps people guessing whether your lips are just naturally full.
The quick checklist
- Extend only one to two millimeters past your natural lip line
- Use a liner matching your lip tone, never darker than your lipstick
- Overline the cupid's bow and center of the bottom lip, skip the corners
- Fill the whole lip with liner to anchor the shape and grip lipstick
- Blend the outer edge with a fingertip so there's no hard line
- Add a dab of light gloss in the center for extra dimension
- Choose satin or matte over heavy gloss to avoid edge migration
- Check the look in natural light and a selfie before heading out
✦ Free to start✨ Try these looks on your own selfie with GlowMaxing →Upload one selfie and try any hairstyle, color or makeup look instantly with AI. Free to start.Download on theApp Store