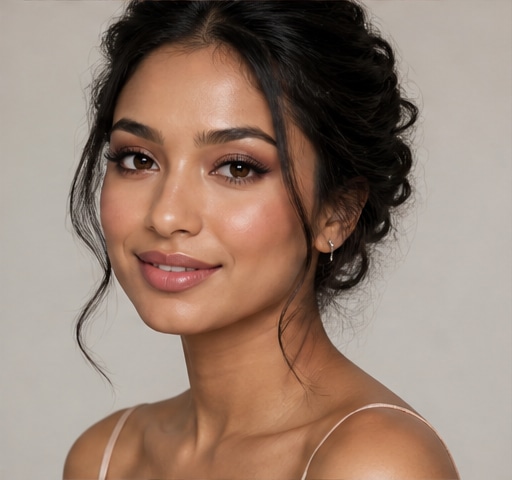
 Try this styleon your selfie · free
Makeup for Hyperpigmentation: Even Out Your Tone
Published September 25, 2026
Color theory, the right coverage, and a smart layering order let you neutralize dark spots without caking on foundation.
Understand What You're Covering
Hyperpigmentation isn't one thing, and treating it like flat 'darkness' is why most people over-apply. Post-inflammatory marks from acne usually read brown or reddish-brown on lighter skin and deep brown to gray on darker skin. Melasma sits in larger cloudy patches, often on cheeks and forehead, and can have a bluish undertone. Sun spots are sharply defined and tan-to-brown. The undertone of the spot dictates your color corrector: brown and gray spots need a peach or orange counter-tone, red marks need a touch of green, and bluish melasma responds to peach as well. Spend ten seconds in good daylight identifying the dominant color before you touch a product. That single habit saves you from the gray, ashy cast that happens when you bury warm pigment under cool concealer.
Prep So Coverage Actually Lasts
Discoloration shows more on dry, uneven texture because product settles into it and looks patchy by midday. Start with a hydrating moisturizer and let it absorb for two to three minutes, then a thin layer of SPF 30 or higher every single morning. UV exposure is the number one driver of darker spots, so sunscreen is treatment and makeup-prep at once. Follow with a smoothing, grippy primer concentrated on the areas you'll be color-correcting. Skip heavy silicone primers directly over flaky patches, which can cause pilling. If your spots are on raised acne scars, a tiny amount of blurring primer pressed in helps light bounce evenly. Let each layer set for thirty seconds before the next so nothing slides. Well-prepped skin means you need dramatically less correcting product, which is the whole goal.
Color-Correct Before Concealer, Not After
This is the step that separates streaky coverage from seamless. Using a small synthetic brush, dot a peach or orange corrector only onto the spot itself, not the surrounding clear skin. For light to medium skin, go peach; for deep skin, a true orange or brick tone neutralizes brown more honestly than peach ever will. Tap, don't drag, with a clean fingertip or a damp sponge to fade the edges. The corrected area should look muted and slightly warm, not painted. Less is genuinely more here. One pinhead of product covers a quarter-sized patch when it's the right shade. Wait a full minute, then assess. If the spot still peeks through, add a second whisper-thin layer rather than one thick one. Thick correcting cracks and oxidizes; thin layered correcting stays invisible for hours.
Layer Foundation and Concealer the Smart Way
Once correction is set, apply your foundation over the entire face in a sheer-to-medium layer using a damp sponge, bouncing rather than wiping so you don't disturb the corrector underneath. A buildable medium-coverage formula beats a heavy full-coverage one, which tends to emphasize texture around spots. After foundation, only the most stubborn spots may still need a pinpoint of concealer that matches your foundation exactly, pressed on top and feathered out. Set just those areas with a light dusting of finely milled translucent powder to lock the layers. Resist powdering the whole face heavily; it flattens skin and makes correction look obvious. Curious how a specific look reads on your own face before you commit a morning to it? You can preview makeup styles on your selfie in GlowMaxing and see the finished effect instantly.
Choose Finishes That Disguise, Not Highlight
Finish placement quietly makes or breaks an even-tone look. Shimmer and high-shine highlighter draw the eye and exaggerate any texture or remaining shadow, so keep glow on the high points well away from pigmented zones, like the very tops of cheekbones, brow bone, and cupid's bow. Over melasma-prone cheeks and forehead, favor a soft satin or natural finish rather than dewy or matte extremes, both of which can spotlight discoloration. A skin-tone-matched cream blush blended slightly above the correction adds dimension that distracts from flatness. Finish with a fine setting mist held at arm's length and one light pass; this melds powder into skin so corrected areas don't look drier than the rest. The illusion of even tone comes from controlling where light lands as much as from coverage itself.
Maintain the Look Through the Day
Even perfect application needs gentle upkeep, especially in heat or long events. Carry a small damp sponge or a folded blotting paper, never a powder compact alone, because the instinct to repowder over a fading spot is what creates cake. Blot oil first, then if a corrected area lightens, press a tiny dot of cream concealer back in with a fingertip and pat to blend, rather than dusting more powder. Keep your hands off your face; touching transfers oil and lifts product specifically from raised spots. If you're outdoors, a powder or stick SPF reapplied over makeup protects against the very sun exposure that darkens spots long term. With this routine, coverage that started seamless at 8 a.m. still reads natural at 8 p.m., and your skin underneath is genuinely better protected for it.
The quick checklist
- Identify each spot's undertone in daylight before choosing a corrector
- Use peach for light-medium skin, true orange for deep skin to neutralize brown
- Apply SPF 30+ every morning as both prep and pigmentation defense
- Correct spots first, then sheer foundation over the whole face
- Layer thin coats instead of one thick layer to avoid cracking
- Keep shimmer and dewy finishes away from pigmented zones
- Blot and press, never dust extra powder, for touch-ups
✦ Free to start✨ Try these looks on your own selfie with GlowMaxing →Upload one selfie and try any hairstyle, color or makeup look instantly with AI. Free to start.Download on theApp Store