
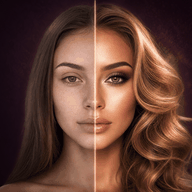
 Try this styleon your selfie · free
How to Prep Your Hair Before a Big Color Change
Published September 17, 2026
The two weeks before a dramatic color appointment matter more than the dye itself; here's how to set your hair up to win.
Start With an Honest Hair Health Check
A big color change, especially going significantly lighter or stripping out old dye, is chemically demanding, and healthy hair takes color more evenly and survives the process intact. Two to three weeks out, assess your starting point. Does your hair feel gummy or stretchy when wet, snap easily when dry, or look frayed at the ends? Those are signs of compromised integrity that bleach will worsen. If you've recently used heavy heat, had a previous failed color, or have buildup from hard water, factor that in. Be realistic about how far you can go in one session; reputable colorists often split a dramatic transformation across multiple appointments to protect your hair. Walking in with an honest picture of your hair's condition lets your stylist plan a process that won't leave you with breakage.
Deep Condition and Bond-Build Beforehand
Strong, hydrated hair handles chemical processing far better, so the weeks before your appointment are for intensive nourishment. Use a deep conditioning mask once or twice a week, and add a bond-building treatment if you're going lighter, since these reinforce the internal disulfide bonds that bleach attacks. Focus moisture on your mid-lengths and ends, which are the oldest and most fragile parts of your hair. Don't overdo protein treatments right before coloring, though; too much protein can make hair stiff and brittle, so balance protein with moisture. The aim is supple, resilient hair that flexes rather than snaps. This prep won't change the color outcome directly, but it's the difference between leaving the salon with shiny, intact hair versus straw, which is exactly what you don't want after spending hours in the chair.
Lay Off Heat and Harsh Styling
Heat tools weaken and dehydrate hair, and stacking thermal damage on top of an upcoming chemical service is asking for breakage. For at least one to two weeks before your appointment, dial back the flat iron and curling wand, or drop the temperature and always use heat protectant. Embrace air-drying and heatless styles to give your hair a recovery window. Skip tight styles that stress the hairline and any DIY treatments you're unsure about. The goal is to arrive with hair in its calmest, strongest state. This also gives your colorist a true read on your hair's natural texture and condition rather than a heat-styled version of it. A short break from hot tools costs you nothing and meaningfully improves how your hair tolerates the color process.
Don't Wash Right Before Your Appointment
Counterintuitively, slightly dirty hair colors better, especially for bleach and scalp-adjacent application. The natural oils on your scalp form a protective barrier that reduces irritation and burning during a lightening service. Skip washing for one to two days before your appointment; arriving with day-old hair is ideal. That said, avoid heavy product buildup like thick dry shampoo, gels, or oils on the day, since these can interfere with even color deposit. If you have significant buildup or hard-water minerals, ask your stylist whether a clarifying or chelating wash is needed first; sometimes they'll do it in-salon. The simple rule: clean enough to be free of heavy product, but not freshly stripped of the protective oils your scalp produces. When in doubt, ask your colorist their preference when you book.
Preview the Color and Bring References
Color looks wildly different depending on your starting shade, skin tone, and how your hair takes pigment, so going in with a clear, realistic reference is everything. Vague requests like just lighter or a fun color lead to mismatched expectations. Preview the shade on your own selfie in GlowMaxing so you can see how a specific color reads against your skin and current length before you commit, then save a few angles to show your stylist. Bring two or three reference images of the actual tone and dimension you want, plus an honest description of your maintenance appetite. Discuss whether your goal is achievable in one session given your starting color and hair health. The clearer your communication and references, the closer the result lands to what you imagined.
Do a Strand Test and Plan Aftercare
For dramatic changes, a strand test is your insurance policy. It shows how your specific hair reacts to the formula and timing, catching surprises like uneven lift or unexpected warmth before they happen on your whole head. Any cautious colorist will do one for a major transformation; if you're coloring at home, never skip it. While you're prepping, also line up your aftercare so you're not scrambling later. Stock a sulfate-free color-safe shampoo, a matching toning product if you're going cool or blonde, a deep conditioner, and a heat protectant before the appointment. Knowing the first 72 hours after coloring require no washing and gentle handling, you can plan your schedule around it. Prepping aftercare in advance means your fresh color is protected from the moment you walk out the door.
The quick checklist
- Assess hair health two to three weeks before your appointment
- Deep condition weekly and bond-build if going lighter
- Balance protein and moisture; don't overdo protein pre-color
- Cut back heat styling for one to two weeks beforehand
- Arrive with day-old hair, free of heavy product
- Bring clear reference images and an honest maintenance budget
- Insist on a strand test for any dramatic change
- Stock color-safe aftercare products before your appointment
✦ Free to start✨ Try these looks on your own selfie with GlowMaxing →Upload one selfie and try any hairstyle, color or makeup look instantly with AI. Free to start.Download on theApp Store