 Try this styleon your selfie · free
Slicked-Back Sleek Bun: The Edge Control Routine That Lasts All Day
Published October 15, 2026
The layering order, tools, and touch-up tricks that keep a sleek bun glassy and flyaway-free from dawn to dusk.
Why Sleek Buns Get Fuzzy by Noon
A slicked-back bun looks effortless but punishes shortcuts. It goes fuzzy because of three things: insufficient hold product, applying product to dry hair that has already started to frizz, and skipping a setting step that locks everything in. Sleekness is a layering job, not a single swipe of gel. You need a base that smooths, a brush that lays every strand flat, a defined edge routine for the hairline, and a finish that seals it all against humidity and friction. The good news is that once you nail the order of operations, a sleek bun is genuinely low-maintenance for the rest of the day. The effort is entirely front-loaded; get the foundation right and you will not be fighting flyaways every hour.
Prep: Dampen and Smooth First
Always start on damp hair, not bone-dry. Lightly mist your whole head with water, or work on towel-dried hair, because damp strands lie flat and absorb product evenly, while dry hair traps air and frizz. Apply a small amount of a smoothing cream or a few drops of lightweight oil through the lengths first to tame the surface, then comb through to detangle completely, any knot left behind becomes a bump in the finished bun. If your hair is prone to flyaways, a little leave-in conditioner at this stage helps. Avoid over-wetting; you want damp, not dripping, because soaking hair takes too long to set and can leave the bun looking greasy rather than glossy. This damp, smoothed base is what lets the hold product create a glassy finish instead of a crunchy one.
The Slick-Back Technique
Apply a styling gel or a strong-hold pomade to the surface of your hair, working from the hairline back, then use a boar-bristle or fine-tooth brush to sweep everything tightly toward the crown or nape, depending on bun height. Brush in the same direction repeatedly to flatten every layer, re-wetting the brush slightly if the hair starts to lift. For an ultra-glassy top, wrap a silk or satin scarf snugly around your slicked hairline for a few minutes while you gather the ponytail, this presses the hairs flat and sets them. Gather the hair into a tight ponytail at your chosen height and secure with a strong elastic. The smoother and tighter the slick-back before you even form the bun, the more polished the final result; bumps at this stage only get more obvious later.
Edge Control Done Right
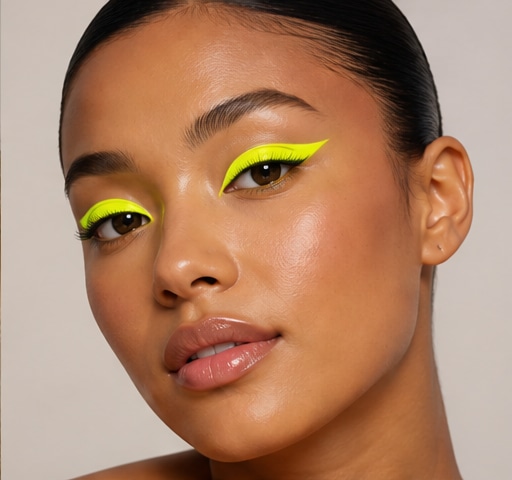
Edges make or break a sleek bun. Use a dedicated edge control gel, not regular styling gel, applied with a small edge brush or a clean toothbrush. Take tiny amounts and brush your baby hairs into smooth, deliberate shapes, whether you want them slicked flat or styled into soft swoops. Work in thin layers rather than gobbing product on, which flakes and looks wet rather than sleek. Once your edges are laid, tie a silk or satin scarf around your hairline for five to ten minutes to set them firmly, this is the step that makes edges survive a full day instead of lifting within the hour. Let the edge control dry fully before removing the scarf. Resist re-touching them, fiddling lifts the hairs you just set and reintroduces the frizz you worked to eliminate.
Forming and Setting the Bun
Twist the ponytail into a coil and wrap it around the base, pinning with U-shaped pins pushed in and back to grip securely. For a sleeker finish, smooth the bun's surface with a touch more gel or pomade on your palms and press any stray hairs flat. Wrap a small piece of the ponytail's end around the base to hide the elastic if it shows. Then comes the lock-in: mist the entire style, bun and slicked sections, with a strong-hold hairspray, and lightly run a smoothing brush over the surface one final time to catch flyaways into the spray. For maximum staying power, hold a blow-dryer on low cool air over the slicked sections for a few seconds to set the gel solid. A clean, secured bun plus a sealing mist is what carries the style through a long day.
All-Day Hold and Touch-Ups
To survive humidity and movement, finish with a flyaway-taming step: smooth a tiny drop of oil or a dedicated anti-frizz product over the surface, or press a soft, hairspray-misted brush across the top. The scarf-setting on both the slick-back and the edges is your biggest insurance, those minutes of compression are why salon sleek buns last. Carry a travel edge brush and a small tin of gel for quick fixes; if edges lift by afternoon, re-lay only the strays rather than redoing everything. A spritz of hairspray on a brush smooths a fuzzy crown in seconds. If you want to preview how a sleek bun suits your face shape before committing to the routine, try the look on your own selfie with GlowMaxing first. At night, take it down gently and rinse out gel buildup to keep your hairline healthy.
The quick checklist
- Always start on damp, fully detangled hair, dry hair traps frizz
- Layer in order: smoothing base, then hold product, then brush flat
- Use a dedicated edge control with a fine brush, applied in thin layers
- Tie a silk scarf over slicked hair and edges for 5-10 minutes to set
- Lock the finished bun with strong-hold spray plus a final smoothing pass
- Set the gel solid with a few seconds of cool air from a blow-dryer
- Carry a travel edge brush and gel, re-lay only the strays for touch-ups
✦ Free to start✨ Try these looks on your own selfie with GlowMaxing →Upload one selfie and try any hairstyle, color or makeup look instantly with AI. Free to start.Download on theApp Store