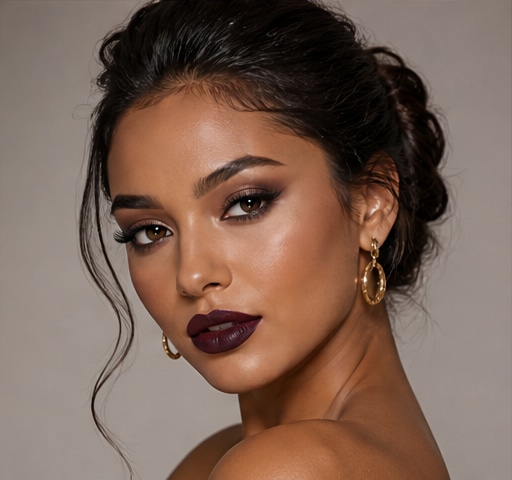
 Try this styleon your selfie · free
The Smoky Eye Tutorial That Works on Any Eye Shape
Published June 29, 2026
The universal smoky-eye method plus the small placement tweaks that flatter every eye shape.
The Anatomy of a Smoky Eye
A smoky eye isn't one specific look, it's a technique: a seamless gradient of color, darkest at the lash line, fading lighter toward the brow, with no hard edges anywhere. Master the gradient and you can do it in any color, classic black, soft brown, bronze, plum, or grey. The core formula uses three shade roles: a transition shade close to your skin tone in the crease, a medium-deep shade built into the outer corner and lid, and the deepest shade pressed right along the lash line. The whole effect lives in the blending, smoke has no edges. Beginners often go too dark too fast, so the smartest approach is building intensity slowly in thin layers. Once you understand it as a buildable gradient rather than just smearing dark shadow everywhere, the smoky eye becomes far more controllable and endlessly customizable for any occasion or eye shape.
Prep, Base, and Tightlining
A smoky eye demands a solid base or it creases and fades within hours. Start with an eyeshadow primer or a tap of concealer set with powder across the lid, this grips the shadow and makes blending smoother. To anchor the smoke and make it intense without muddy fallout, line your upper lash line and waterline with a soft black or brown pencil, this is tightlining, and smudge it slightly with a small brush, it acts as a base for the dark shadow to grip. Pressing dark shadow over a pencil base gives a deeper, longer-lasting color than shadow alone. Tap excess powder off your brush before touching your eye, and hold a tissue under the eye or do shadow before foundation to catch fallout. This unglamorous prep stage is what separates a smoky eye that lasts all night from one that smears into your under-eye by dinner.
Building the Gradient
Now build the smoke in layers. First, sweep your transition shade through the crease with a fluffy blending brush in windshield-wiper motions to soften where colors will meet. Next, pack your medium shade onto the lid and outer corner using a flat or pressing brush, patting rather than swiping so color stays dense. Then take your darkest shade on a smaller brush and press it along the lash line and into the outer corner, concentrating intensity there. Blend the edges of each layer upward and outward with a clean fluffy brush so the shades melt together with no visible lines, the secret is a clean blending brush doing the diffusing. Bring a little of the dark and medium shade along the lower lash line too, smudging it for a wrapped, smoky finish. Build to your desired darkness gradually, you can always add more, but removing over-applied dark shadow without ruining the gradient is hard.
Tailoring to Your Eye Shape
The same gradient flatters everyone with small placement tweaks. Hooded eyes: map and blend with eyes open, keep the deepest shadow lifted above where the hood folds and extend the smoke up and out so it shows. Round eyes: concentrate darkness at the outer corner and elongate it outward to lengthen the eye rather than emphasizing roundness. Almond eyes: the lucky default, the classic all-over gradient works beautifully as-is. Monolid eyes: apply more shadow and blend it higher than feels natural since there's no crease to catch it, and keep color visible when the eye is open. Downturned eyes: lift the outer smoke upward at an angle to counter the droop. Close-set eyes: keep the inner corner lighter and push the depth outward. Wide-set eyes: bring a little smoke slightly closer to the inner corner. The principle, drag the smoke in the direction that balances your shape, applies universally.
Finishing Touches and Color Variations
Finish with the details that make a smoky eye look complete. Add a touch of light, shimmery shadow on the center of the lid or the inner corner to bring dimension and stop the look from going flat. Curl your lashes and apply a couple coats of volumizing mascara, or add false lashes for full glam, lashes are what make a smoky eye look finished. Clean up any fallout under the eye with a sponge and conceal to sharpen the shape. Beyond classic black, try a warm bronze smoke for a softer everyday version, a plum or burgundy to make green and hazel eyes pop, or a soft taupe-and-brown smoke for an effortless daytime look. If you'd like to see which smoky shade suits you before committing, snap a selfie and preview different makeup looks in GlowMaxing to test colors against your features. Adjust intensity to the occasion, soft and diffused for day, deep and dramatic for night.
Troubleshooting Common Problems
A few issues trip people up, and each has a fix. Muddy color usually means you blended too many shades together or used a dirty brush, so use a separate clean brush just for diffusing and don't overwork the same spot. Patchy or fading shadow points to a missing primer, always prep the lid. Fallout under the eyes happens when you don't tap off excess product, so tap your brush and do your eyes before foundation. Harsh edges mean you stopped blending too soon, keep buffing the outer edge with a clean fluffy brush until it fades to nothing. If the eye looks closed-in or heavy, you went too dark on the inner corner, keep that area lighter and push depth outward. And if it reads uneven side to side, build both eyes in alternating layers rather than finishing one completely first, that keeps them symmetrical and saves you from over-darkening one side.
The quick checklist
- Always prime the lid so the smoke lasts and blends evenly
- Tightline the lash line first to anchor and deepen the color
- Build the gradient in thin layers, darkest at the lashes
- Use a separate clean fluffy brush only for blending edges
- Drag the smoke up and out to flatter most eye shapes
- Add a light shimmer on the lid center for dimension
- Finish with curled lashes and volumizing mascara to complete it
✦ Free to start✨ Try these looks on your own selfie with GlowMaxing →Upload one selfie and try any hairstyle, color or makeup look instantly with AI. Free to start.Download on theApp Store