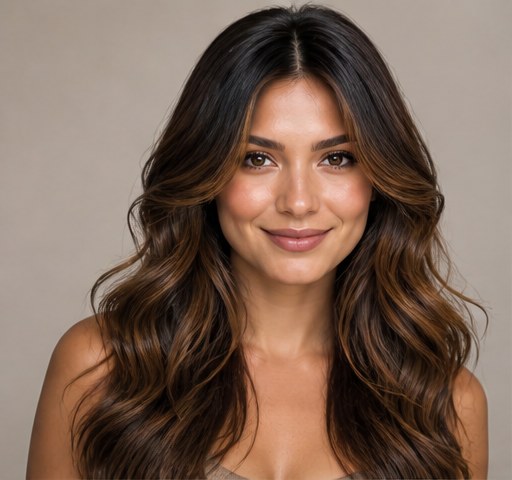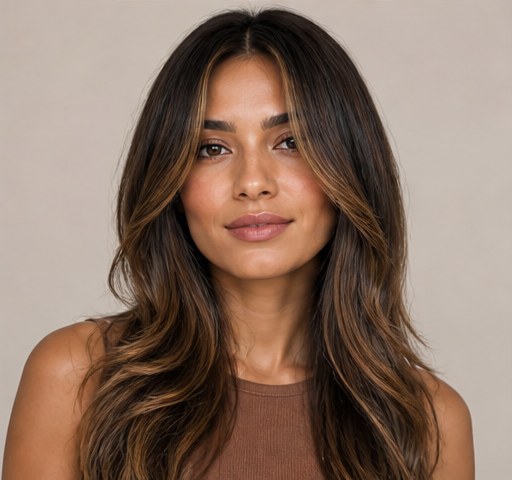
Face-framing layers are the subtle upgrade that flatters everyone — softer pieces cut around the face that contour your features and add movement up front. It's the detail that makes a blow-dry look expensive.
They work with any length and any texture. Here's how to style the framing pieces to curve toward or away from the face, and keep them blending seamlessly into the rest.
 ✦ Free to start✨ Try Face Framing on your selfie →Upload one selfie and try any hairstyle, color or makeup look instantly with AI. Free to start.Download on theApp Store
How to get the look
- 1
Start on clean, towel-dried hair and mist with heat protectant.
- 2
Rough-dry, then section and shape with a round brush or wand.
- 3
Define the style — waves, volume or sleekness — working in small pieces.
- 4
Set with a flexible hairspray and break it up with your fingers.
What you'll need
Hand-picked products — tap to shop on Amazon or Google Shopping.
- Round brushOlivia Garden ceramic round brush
- Ionic blow dryerDyson Supersonic hair dryer
- Heat protectantColor Wow Dream Coat heat protectant
- Curling wandghd curve curling wand
- Sectioning clipsDiane sectioning hair clips
- Texturizing sprayOribe Dry Texturizing Spray
- HairsprayLOreal Elnett hairspray
Your step-by-step product routine
Use them in this order for the best, longest-lasting result.
- 1
Protect. On damp hair, mist a heat protectant (Color Wow Dream Coat) from root to tip — it shields the strand and cuts heat damage by up to 70%.
- 2
Rough-dry. Take hair to 80% dry with an ionic dryer (Dyson Supersonic) to fight frizz, then smooth and lift the roots with the round brush.
- 3
Section. Clip hair into sections (Diane clips) and work one at a time — small sections give a far cleaner, longer-lasting result.
- 4
Shape. Style each section with the wand or brush (ghd), curling away from the face and leaving the ends out for a modern bend.
- 5
Texture. Once cool, work in a little texturising spray (Oribe) for grit, separation and movement.
- 6
Set. Mist a flexible hairspray (Elnett) and break the shape up with your fingers so it moves instead of helmet-setting.
Pro tips
- Use a boar-bristle brush to distribute oils and add natural shine.
- Cool each curl fully before touching it — heat sets the shape as it cools.
- Smaller sections give cleaner, longer-lasting results than big ones.
- A cold shot at the end of your blow-dry locks in shine and hold.
How to make it last
Protect the shape while you sleep and it'll last a second or third day with minimal effort.
- Loose top-knot or silk bonnet at night
- A blast of cool air revives a flat section
- Dry shampoo at the roots buys you another day
Common mistakes to avoid
- Styling soaking-wet hair — get to 80% dry first or it won't hold.
- Skipping heat protectant, then wondering about the breakage.
- Using too much product, which weighs the style down.
FAQ
How do I know a hairstyle will suit me?
Match the cut to your face shape and hair texture — or skip the guesswork and preview it on your own face with GlowMaxing first.
How often should I trim?
Every 8–12 weeks keeps layers sharp and stops split ends travelling up.
Can I try a big chop before committing?
Yes — try a bob, pixie or curtain bangs on your selfie with AI before the scissors come out.