 Try this styleon your selfie · free
The Butterfly Cut: Layers With Bounce
Published April 17, 2026
The layered cut that fakes face-framing volume and movement on long hair.
What the Butterfly Cut Actually Is
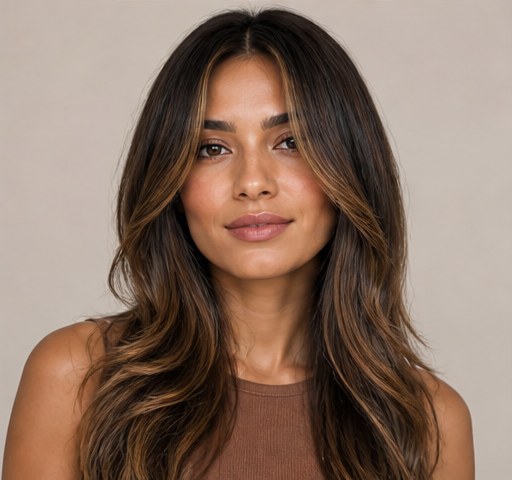
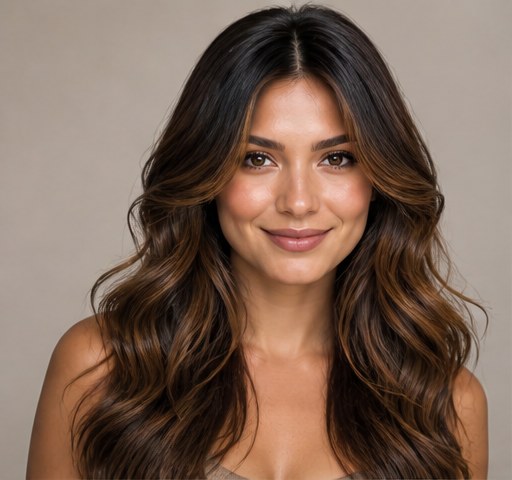
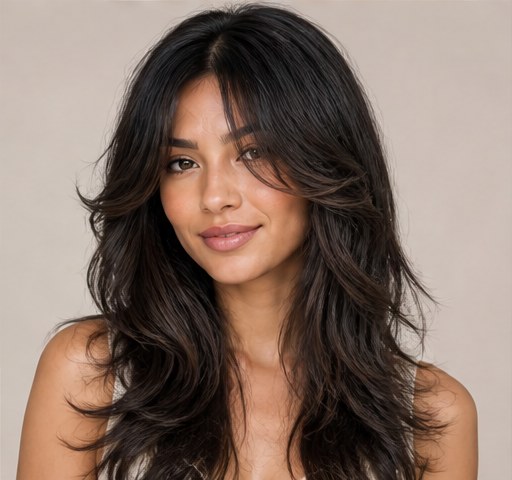
The butterfly cut layers short, face-framing pieces around the crown over long lengths kept underneath, creating the illusion of two layers blending into one. The shorter top layers give volume and movement near the face, while the longer underneath layers preserve your length. When styled, the layers flick out like wings, hence the name. It is essentially a softer, more wearable cousin of the shag, designed to add bounce without committing to a dramatic chop.
The Magic of Face-Framing Layers
The shortest pieces frame the cheekbones and jaw, instantly drawing attention to the center of the face and adding the look of volume to fine or flat hair. These layers are cut to curve away from the face, which gives that lifted, blown-out effect even on lazy days. For thick hair, the longer internal layers remove bulk and create movement so the cut does not sit heavy. The beauty is that it flatters nearly every length from collarbone to mid-back.
Who It Flatters
The butterfly cut suits most face shapes because you can place the shortest framing pieces wherever you want to draw the eye. Round faces benefit from longer face-framing that starts below the chin to elongate, while longer faces can have shorter pieces at the cheekbone to add width. It works on straight, wavy and curly textures, though wavy hair shows off the layered movement most naturally. Preview the layered shape on your selfie in GlowMaxing to find the most flattering placement for your features.
Styling for Maximum Bounce
The signature bounce comes from a round-brush or large-barrel curling iron used on the top layers, flicking the face-framing pieces away from the face. Blow-dry with a volumizing mousse, then wrap the shortest sections around a wand bending them outward for that winged effect. A texture spray keeps the layers separated and piecey rather than blended into a solid mass. For an undone version, scrunch in a wave spray and diffuse, letting the layers fall naturally.
Low-Effort Everyday Versions
Not every day calls for a full blowout, and the butterfly cut still moves beautifully air-dried with a little cream and scrunch. Pull the back into a low pony or claw clip and the shorter front layers fall as built-in face-framing tendrils. The layers also make a half-up style look intentionally voluminous with almost no effort. Because the shape is built into the cut, even minimal styling reads as deliberate and polished.
Keeping the Layers Looking Fresh
Because the butterfly cut relies on the contrast between short and long layers, it needs a trim every eight to ten weeks before the shortest pieces grow into the longer ones and lose their shape. Use a heat protectant whenever you blow-dry or curl the framing layers, since they take the most heat. A lightweight volumizing or texture spray maintains the bounce between washes. When the layers start looking shapeless, that is your cue to rebook before the definition disappears.
The quick checklist
- Place the shortest layers to flatter your face shape
- Flick face-framing pieces outward with a round brush
- Use texture spray to keep layers piecey
- Try a claw clip to show off the framing tendrils
- Preview layer placement on your selfie first
- Trim every 8 to 10 weeks to keep definition
✦ Free to start✨ Try these looks on your own selfie with GlowMaxing →Upload one selfie and try any hairstyle, color or makeup look instantly with AI. Free to start.Download on theApp Store